Sometimes one screen just isn’t enough and you’d like to use two screens with your Chromebook. Most newer Chromebooks have HDMI and/or USB-C ports that support additional monitors. You can show the same image on both screens or use each screen independently and move your mouse between the two.
Connect Second Screen To Chromebook with HDMI Cable
Most newer computer monitors have HDMI ports. You can even use a TV as a second monitor. The first thing you will need is an HDMI cable. If the second screen will be next to your Chromebook, a 3ft or 6ft cable will work. If connecting to a TV to show a movie, photos, or play a game, you may want a longer cable.
I wouldn’t purchase a cable longer than 25ft. Though there are longer HDMI cables, your Chromebook may not be able to push the signal the full length of a longer cable. Plug one end of the HDMI cable into the monitor or TV HDMI port. Plug the other end into the Chromebook’s HDMI port.
If your Chromebook does not have an HDMI port, it likely has a USB-C port. You can still use your second screen with a USB-C to HDMI adapter. In fact, if you are going to need to buy a cable and an adapter, you may want to just purchase a cable with HDMI on one end and USB-C on the other.
Connect Second Screen To Chromebook with USB-C Cable
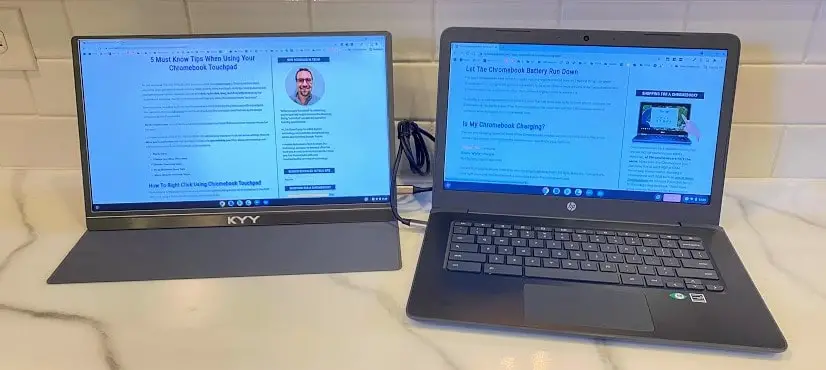
I use a 15″ portable monitor as the second screen for my Chromebook. It is lightweight, thin, and connects to my Chromebook via an included USB-C cable. The Chromebook even powers the screen.
Just like with the HDMI cable, the Chromebook Extends the display by default.
Chromebook Extended and Mirrored Modes
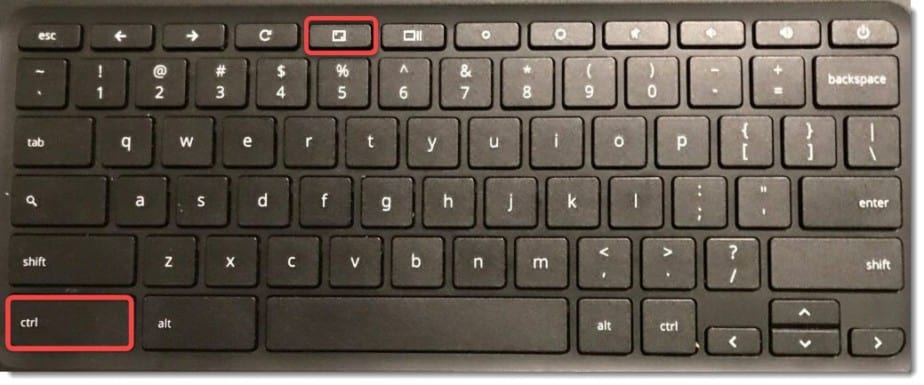
By default, your Chromebook will Extend the desktop. This means each screen shows a different image and you can move your mouse from one screen to the other. You can also Mirror your displays which would show the same image on both screens. You can swap between Extended and Mirrored modes by pressing Ctrl + Full Page buttons.
Change the Location of Your Second Display Screen
It makes the most sense to put my second screen on the left side of my Chromebook due to where the ports are located. However, by default, the Chromebook assumes the second monitor is on the right side. When I move the mouse pointer to the right of my main screen, it moves to my second screen.
Thankfully, you can easily change the screen arrangement in Chrome OS. Google makes it easy to navigate to settings by searching.
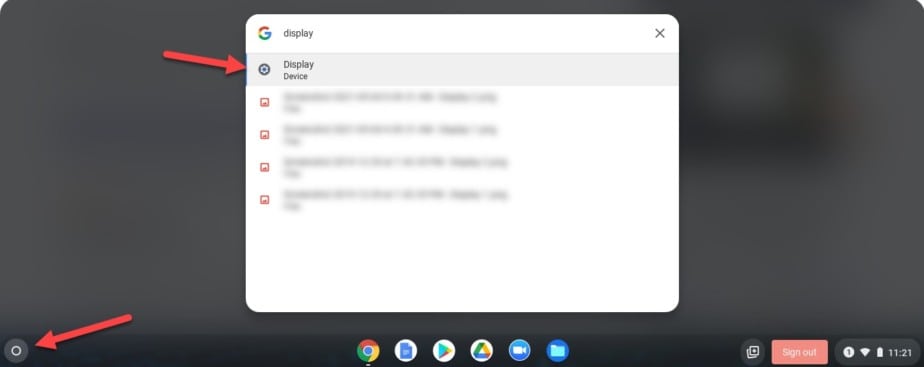
- Click the App Launcher (Start Button) in the bottom left of the screen
- Type Display and press Enter
- Click on Display
- Under Arrangement, you will see two rectangles. These represent your two screens.
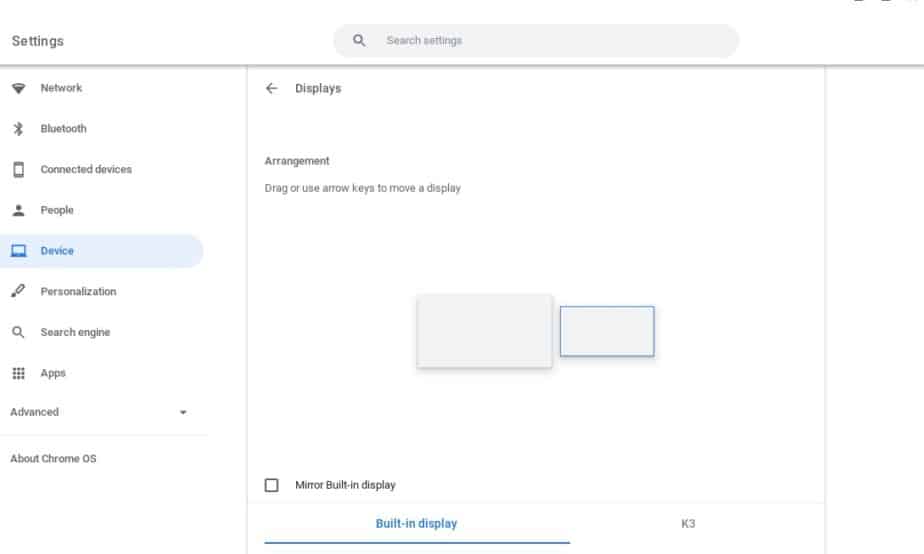
- Click and drag the screen on the right over to the left.
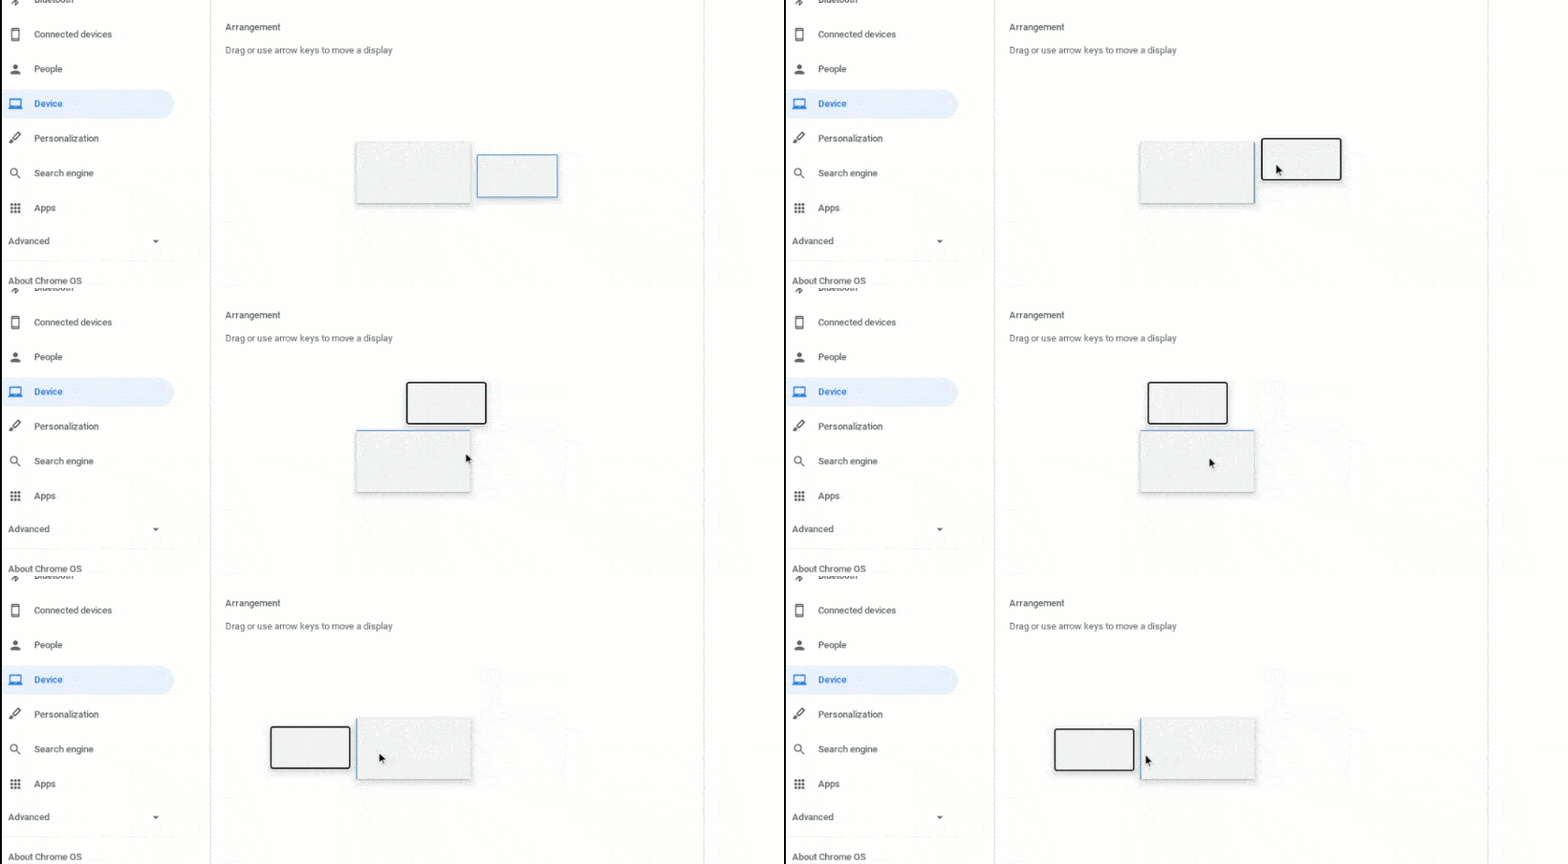
- Your Chromebook now knows that the second screen is on the left of the Chromebook and will remember this the next time you connect the screen.
You can also move one screen above the other if this makes sense for your layout.
Connect Chromebook to a VGA Monitor
Have an older VGA monitor sitting around? You can use it as a second screen for your Chromebook. Most newer Chromebooks do not have a VGA port. However, there are USB-C to VGA adapters you can buy for less than $15. That’s much cheaper than buying a new monitor.
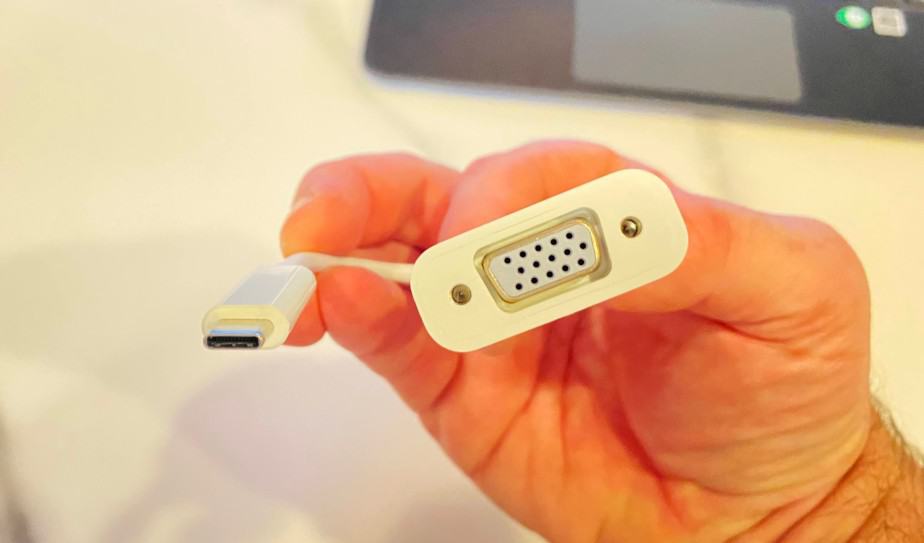
Just like with the HDMI and USB-C ports, the Chromebook Extends the display by default. Read the sections above to learn how to change settings.
Use A Docking Station with Your Chromebook
As an additional option, I’ll mention you can use a Chromebook with a docking station. Most newer docking stations connect to Chromebooks and other laptops via a USB-C connection. There are a few advantages to using dock.
- Gain additional ports such as:
- USB-A ports. These are the type you’ve used for years
- Displayport
- NIC / Hardwired Network Connection
- *Power your Chromebook
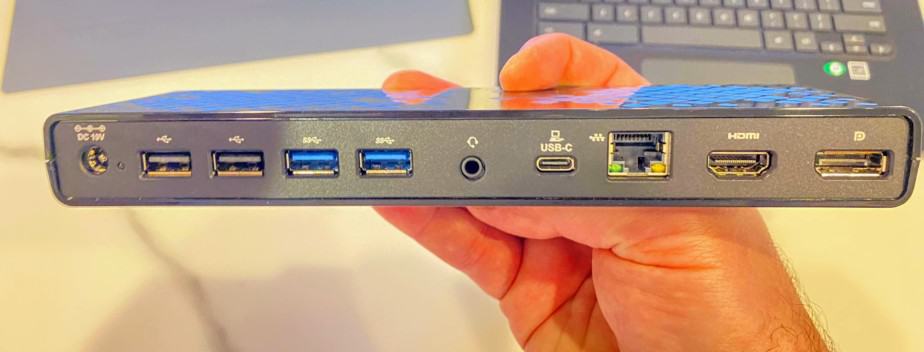
Not all docks will provide power to your Chromebook. I use this MediaGear USB-C Docking Station that has the convenience of powering my Chromebook. It also easily allows me to use a standard keyboard or mouse.
