Keep is a free Google Workspace app that allows you to create, store, organize and search notes. It is both powerful and simple to use making it an ideal note-taking app. Google Keep works on most devices with a web browser and has dedicated apps for Apple iOS and Android phones.
I use Google Keep in conjunction with Google Tasks to keep up with notes, to-do lists, and tasks for both work and my personal life. Let’s look at the benefits of using Google Keep.
What Can I Use Google Keep For?
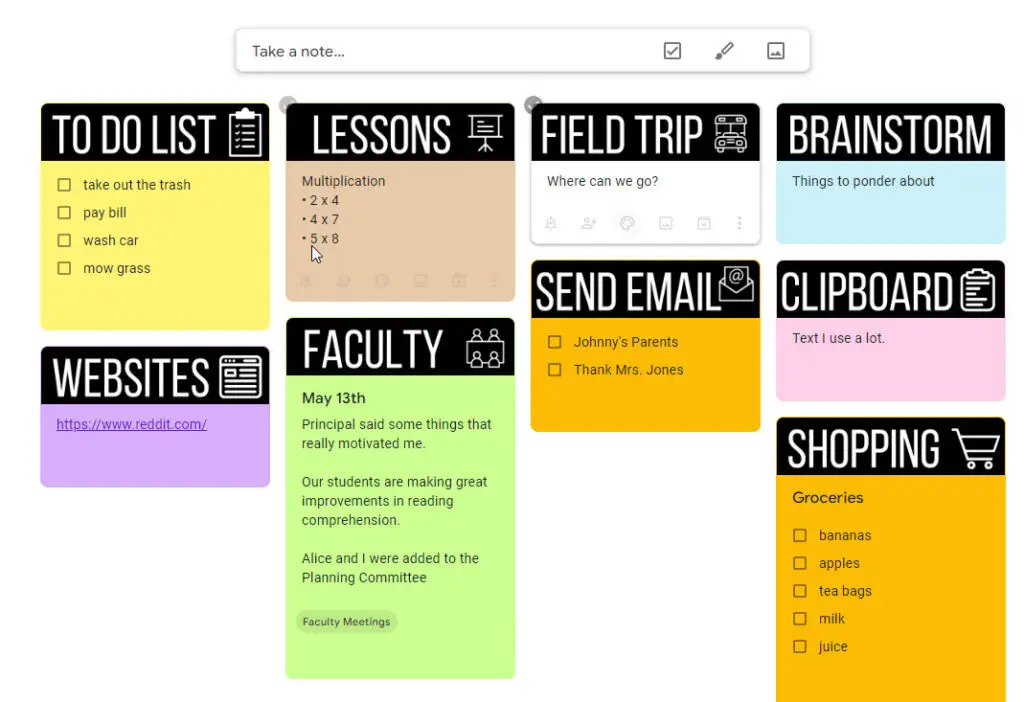
Notes created in Google Keep look a lot like Post-It notes. They can be different colors and will expand as long as needed to fit the information you want to write.
Google Keep notes are great for:
- Meetings
- Reminders
- Checklists
- Brainstorming
- Web site links
- Planning
- Clipboard for often used text
Google Keep notes can be shared with family and colleagues for collaboration. You can create a grocery list that allows you or someone you share the list with to check off each item as they put it in their shopping cart.
Google Keep supports bulleted lists, making it great for taking notes in meetings and school.
Is Google Keep Better Than OneNote and Evernote?
Google Keep isn’t in the same league as OneNote and Evernote. That’s part of why Google Keep is so handy. OneNote and Evernote are both good notebook applications with tons of features. However, those features come with a cost.

Google Keep is an easy-to-use and fast application. I often need to jot an idea down that I just thought about or an address some just told me. I used to try and do this with OneNote, but it was too slow to open up the right notebook and page. By the time I got to the right spot, I had often forgotten what I wanted to write down.
OneNote and Evernote are good for major projects and note organization, but I find that Google Keep is better for the day-to-day things I need.
Add a Background Image to a Google Keep Note Header
Even if you use different background colors for your Google Keep notes, after a while, your list of notes can get a bit congested. One way to make notes stand out is to set to put a picture in the header.
The first thing you need to do is create a header image. There are many free websites that will allow you to make images. Canva is simple to use and does a great job. I created my images 576px 144px. PX is short for pixel. If you want yours a little taller to add two lines of text you could make them 576px x 288px. Google Keep will use any size image, but too big of an image takes up a lot of screen real estate.
Once you have your images created, you are ready to create notes with image headers by clicking the “New note with image” button as shown below. Then you’ll be prompted to choose your image.

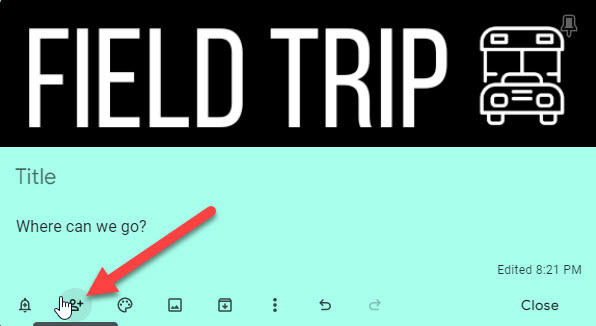
If you already have notes you can still add header images to them. Let’s do that with a basic to-do list.
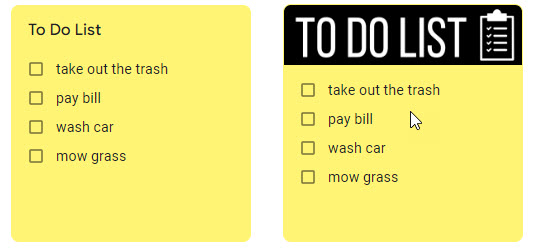
- Click on the note that you want a header image.
- Click the “add image” button (square with mountains).
- Browse to the location of your image.
- Click on the image you want to use as your header.
- Click Open
- (Optional) Delete text title.
See the process in action, below.
Remove Background Image Header From a Note
You can remove an image header easily. If you decide you want to replace the image header, I recommend removing the current image first. Otherwise, both images will be attached to the note.
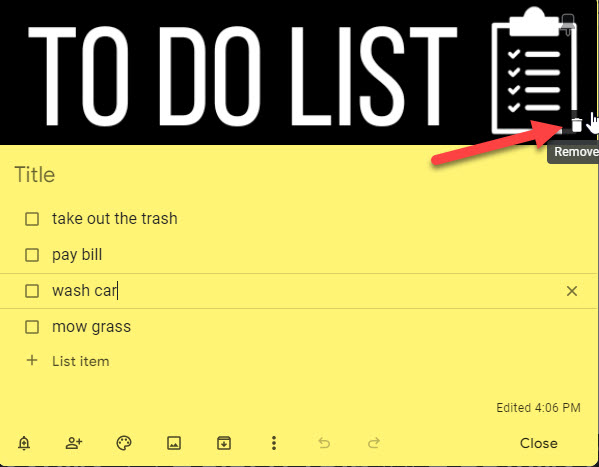
To remove a Google Keep note Header image:
- Click on the note you want to edit.
- In the bottom right of the image, click the trash can icon.
- Depending on the color of your background image it may be difficult to see the trash can, but it is there.
What Are Labels Used For in Google Keep?
Labels serve as an optional way to group notes together. For example, you could create a label called Faculty Meetings. Then you can apply that label to all of your Faculty Meeting notes either as you create them or after the fact. You can create up to 50 labels to use in Google Keep.
There are a few different ways to create a Label. You can edit your Label list by clicking Edit Labels on the left side of the screen.
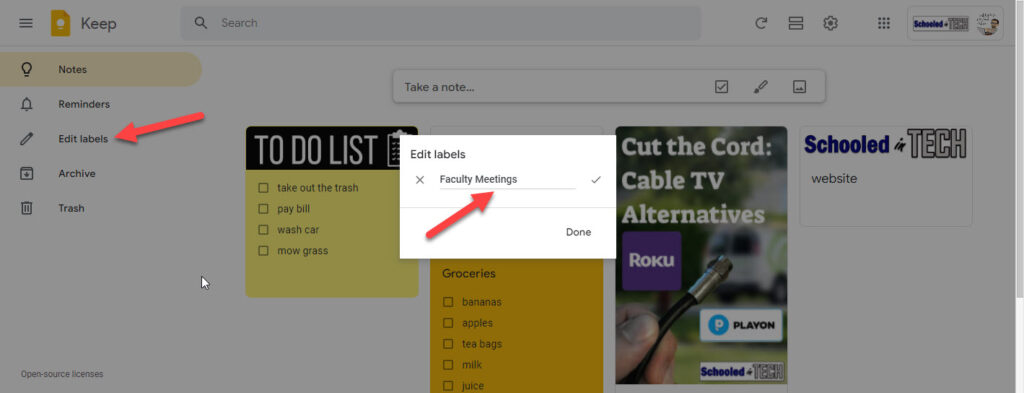
You can also create a new Label from within a note or apply an existing label. I applied the Faculty Meeting label to the note below.
Once your notes are labeled, you can search Google Keep for Faculty Meetings or click on the label on the left side of the screen, and Google Keep will filter the screen to show your Faculty Meeting notes.
Another way to add a label to a note is by using a hashtag or # symbol. Using our previous example, if you type #Faculty Meeting anywhere in the note, it will be assigned the Faculty Meeting label.
Personally, since searching for text works so well, I rarely add a label to my notes. Also, your labels only show up for you. If you share a note with some, they will not see the label
How To Share a Google Keep Note
When you share a note within Google Keep, they become a collaborator. There is not a read-only option. Collaborators can edit notes just like you. Collaborators can also delete a note. If a collaborator deletes a note, it is deleted for everyone. I’d remind people of that fact before making them a collaborator.
Collaborators can make the following changes to a note which won’t affect anyone else.
- Add a label
- Change color
- Archive the note
- Add a reminder
To Share a Google Keep Note:
- Click the person with the plus icon
- Enter the email address of who you want to add a collaborator.

- Click Save
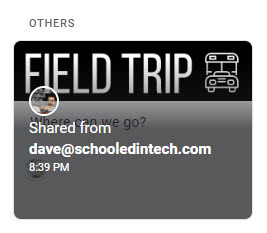
The shared note will now show up in the Collaborators list of notes in Google Keep. Since it was just updated, it will show up at the top of the list right below pinned notes.
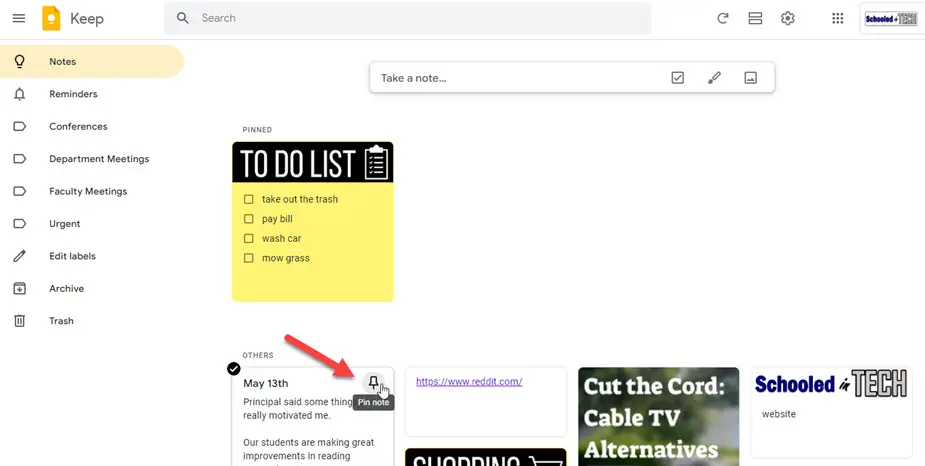
How To Pin Notes in Google Keep
Google Keep stores notes chronologically which means your newest notes should be at the top. Searching for notes is also easy to do. However, if you have a note that you visit a lot such as a daily to-do list, you can pin the note. Pinning a note makes it stay at the top of the list.
To pin a note:
- Hover over the note you want to pin
- Click the Thumb Tack in the top right corner of the note.
- If you use image headers, it may be difficult to see the thumbtack, but it is there.
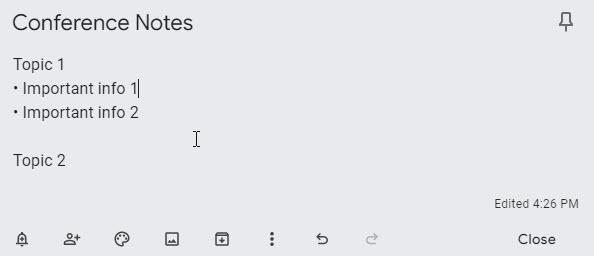
I will often pin notes for upcoming meetings I have throughout the day. It is also helpful when taking conference notes.
Reorder Notes in Google Keep
Whenever you create a new note it is placed at the top of your notes list. You can reposition a note by clicking on a note and dragging it to where you want it placed. Keep in mind, that as you create more notes, the note you moved will shift over and down. If you always want a note close to the top, I recommend pinning the note instead.
Password Protect a Google Keep Note
Google Keep does not support individual passwords for notes, but passwords aren’t necessary. By default, each Google Keep note is only accessible by you. You determine who can have access to each individual note by sharing it with others.
Use Bullets in a Google Keep note
When Google added the ability to use bulleted lists in Google Keep it was a game-changer for me. With this one change, taking notes in meetings and trainings became so much easier to format. Adding bullets isn’t something you are going to stumble upon. That’s because there is not a button to add them. You have to use a keyboard shortcut.
To add a bullet list to a Google Keep note:
- Move the cursor to the line you want your first bullet on
- Press Shift + * (number eight key)
- This will put an asterisk (*) on the screen
- Press the space bar
Now you have your first bullet! Once you type the text you want next to it, press Enter, and Google Keep will create another bullet point. Finished with your bullets? Press Enter again and the bullet will disappear from the current line
Use Checkboxes To Create a Checklist in Google Keep
There are two reasons to make a list that go hand in hand:
- To remember what tasks you need to accomplish
- For the satisfaction of checking off what you have completed.
Few things make you feel more productive than completing a checklist.
To make a new Google Keep checklist, click the new list button in the Take a note… box.

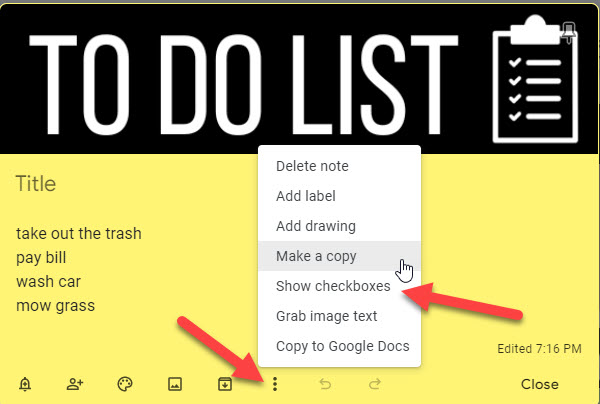
To convert an existing note into a checklist:
- Open the note
- Click the vertical three dots
- Click Show checkboxes
Turning on/off checkboxes is an all or none setting. You cannot have some lines with checkboxes and some without within the same note. I wish Google would add the capability. However, I have to remind myself is one of the best things about Google Meet is it is easy to use. It’s probably best to leave the advanced features to the big boys like OneNote and Evernote.
For most of my daily tasks, I use Google Tasks, but I use Google Keep for checklists such as grocery lists. Besides being able to check off items as you find them, you can share the list.
My wife often texts our kids and me asking if we want anything from the grocery store. This results in a slew of responses in no particular format which she has to scroll through to try and make sure she grabbed everything. A simpler solution would be to use a Google Keep checklist. Let’s take a look at what that would look like.
Below is my example grocery list. I could create a new list each time or use the same one over and over. If you share the list, using the list multiple times probably makes the most sense.
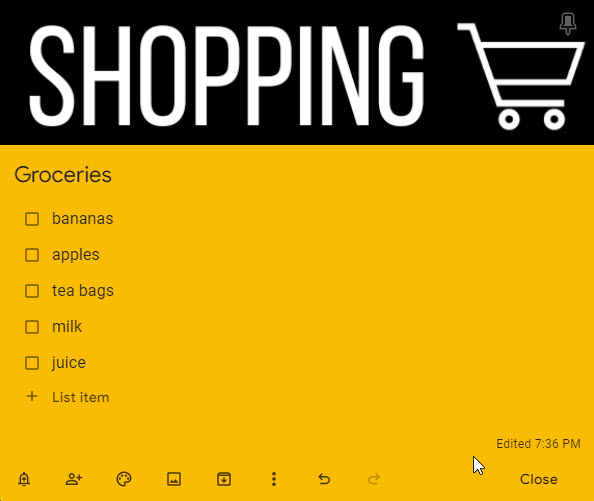
Sharing a note with someone makes the user a collaborator on the note. Collaborators can edit the note just like you can. They can delete it too, so make sure you let collaborators know that.
When you check off something on your Google Keep list, it moves to the very bottom and has a line through it. You can show or hide the checked items by clicking the arrow next to the number of completed items.
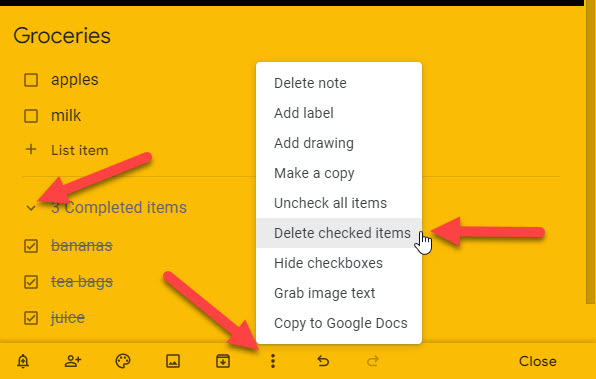
Delete Checked Items from a Checklist:
- Open the note
- Click the three vertical dots
- Choose Delete checked items.
This is helpful when you plan to use the same list multiple times.
As you can see, a Google Keep checklist makes a much easier grocery list than text messages. Also, you could add items to the list in real-time while someone is shopping. However, once the shopper leaves the store, you are probably out of luck until next time.
Create a Drawing Note in Google Keep
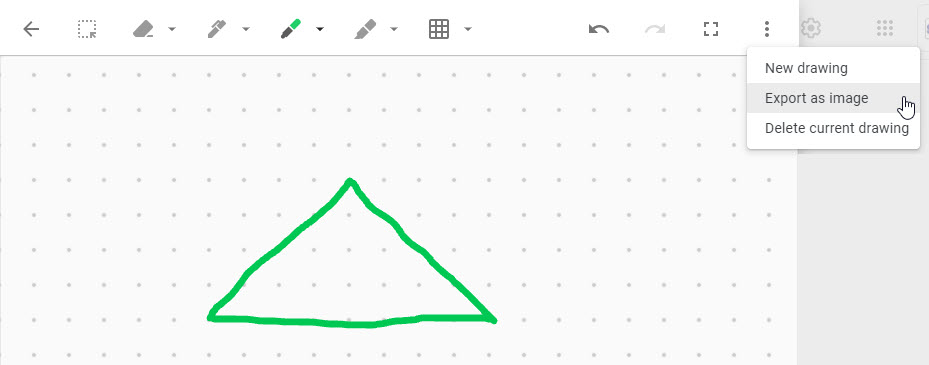
One feature I do not use much, but feel it’s important to mention is you can draw in Google Keep. This is most useful on a computer or Chromebook with a touchscreen, but you can also draw using a mouse or Trackpad. Below is my attempt at drawing a house using my laptop’s trackpad. I’m afraid it would not be much better on paper.

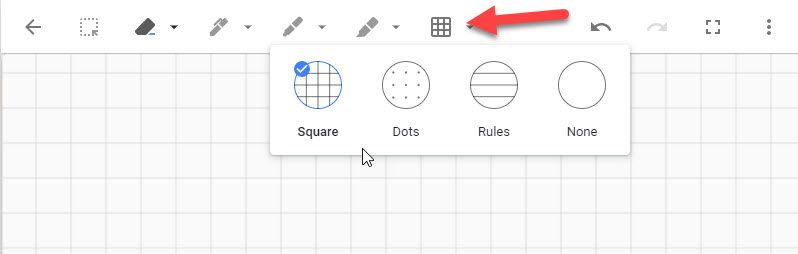
Your drawing will be attached to the header of your note. You can use different colors and line thicknesses in your drawing. Also, you can make the background look like grid paper or dot paper which could be useful for math problems. There is also a ruled line option. If you have a touchscreen that supports using a stylus, lines could be used for handwriting practice.
You can erase parts of your image. There are also undo and redo arrows in the tools bar. If you decide you would like to save your drawing as an image file, click on the three vertical dots on the right side of the toolbar and choose export as image as shown below. The image will be saved as a PNG file.
Set a Google Keep Note Reminder
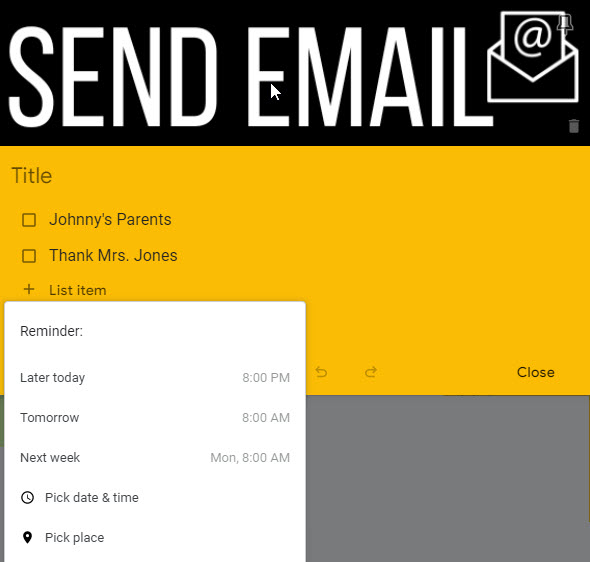
Making a note or checklist is great, but sometimes you can forget to go back and read it. This is where setting a reminder can be helpful. Google Keep has a few default reminder options including Later Today, Tomorrow, and Next Week.
These are good for general reminders, but sometimes you need to be reminded at a specific date and time or when you arrive at a location. Google Keep can handle both of these scenarios as well.
How to set a reminder for a Google Keep note:
- Open the note
- Click the bell icon in the bottom left corner
- Choose one of the following options
- Later Today
- Tomorrow
- Next Week
- Pick date & time
- Pick place
If you choose Pick date & time you’ll be prompted to fill out:
- The date for the reminder
- The time for the reminder
- Do you want to alert to repeat daily, monthly, etc… By default Does not repeat is selected.
If you choose Pick place you’ll be prompted to allow keep.google.com to know your location. You will only need to allow this for your first location reminder or after you clear your browser’s cache.

Send a Copy of Your Note To Google Docs
Sometimes what starts off as a simple note can grow in paragraphs and may exceed the formatting capabilities of Google Keep. There may also be times when you want someone to be able to read the note, but not edit it.
In both of these cases, my recommendation is to move the note to its own Google Doc. Google Keep has this ability built-in.
To convert a Google Keep note to a Google Doc:
- Open the note
- Click the three vertical dots
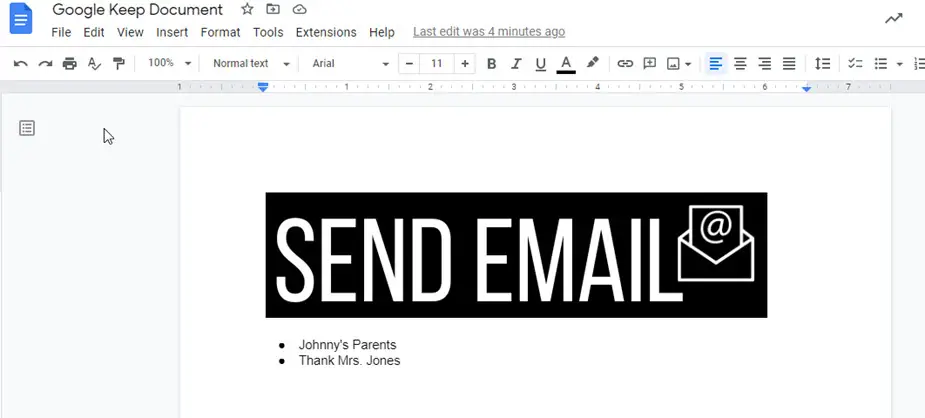
- Choose Copy to Google Docs
A message will pop up in the bottom left of the Google Keep window saying Copied to Google Docs. There will also be an Open Doc link. If you don’t click on the list you can find the newly created file in your My Drive.

Your original note will still exist within Google Keep. Below is an example of a copied Google Keep note.
Archive a Google Keep Note Rather Than Delete It
Have you ever held onto something at home just in case you need it someday and once you finally get rid of it, you need it two weeks later? Me too! This is why I’m always hesitant to delete digital content. The good news is, unlike space in your house, you aren’t going to run out of Google Keep space. This is why I suggest archiving notes rather than deleting them. You know…..just in case.
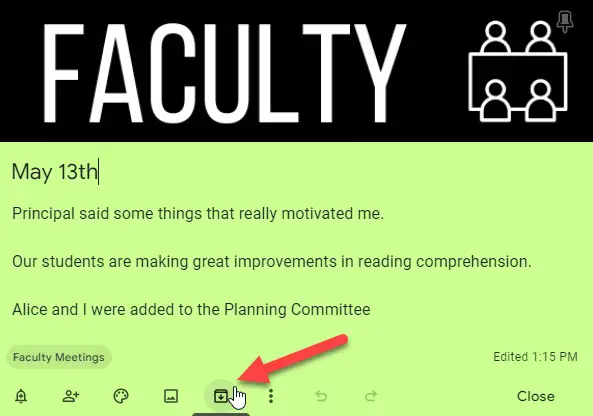
Archiving a note is simple. Open the note and click on the file folder with the down arrow. The note will disappear from view, but you’ll still have access to it by clicking on Archive in the list on the left side of the screen.
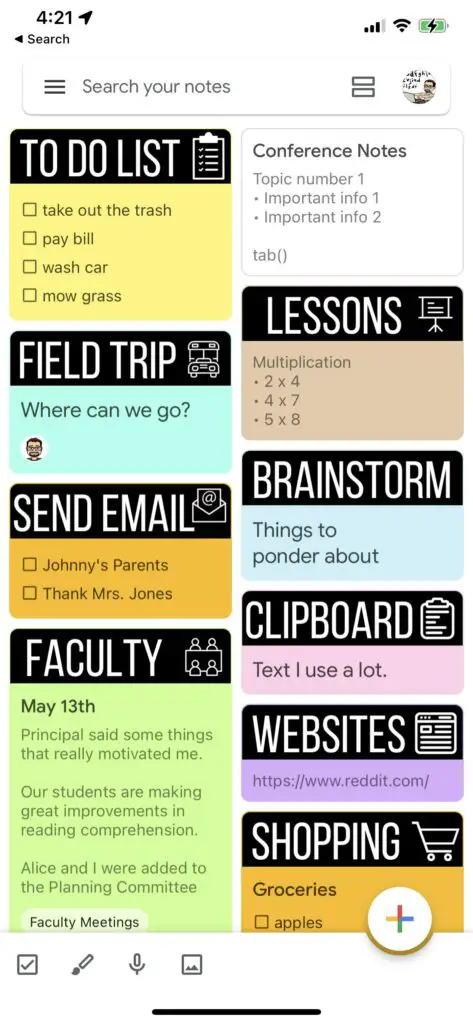
Download Google Keep Mobile Apps
All of the screenshots in this post came from the keep.google.com web app. As I mentioned at the beginning of this article. Google Keep works on mobile too. You can access Keep using your mobile web browser, but I recommend installing the Apple iOS or Android app for a better user experience.
Google Keep Keyboard Shortcuts
When typing notes, needing to use your mouse can affect your speed and thought process. Google Keep has several keyboard shortcuts that can alleviate the need for using the mouse.
Google Keep Application Keyboard Shortcuts
| J | Move to the next note |
| K | Move to the previous note |
| C | Create a new note |
| L | Create a new list |
| / | Search notes |
| X | Select highlighted note |
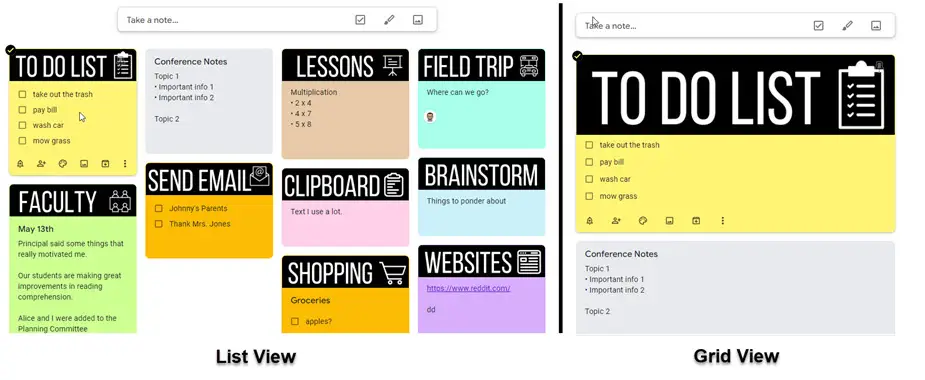
| Ctrl + G | Toggle between list view and grid view (examples in the image below) |
| Shift + ? | Show additional keyboard shortcuts |
Google Keep Keyboard Shortcuts When Note is Selected
You can use the keyboard shortcuts above to select a note or click the checkmark in the top left corner of a note when viewing your list of notes.
| F | Toggle note pinning on/off |
| # | Delete note (move to trash) |
| E | Archive note |
Shortcuts for Google Keep When Editing Note
| Shift + * then spacebar | Create bullet point | |
| Ctrl + ] | Indent List item | |
| Ctrl + [ | Remove indent from list item | |
| Esc | Exit editing mode |
While I use Google Keep for notes, I use Google Tasks for remembering what I need to do and when. Check out my article on how Google Tasks can keep your tasks organized.