If you use a platform other than Gmail for work, school, or your personal email, you can still use Google Tasks. You can use it on a desktop, tablet, or mobile phone without needing the Gmail app.
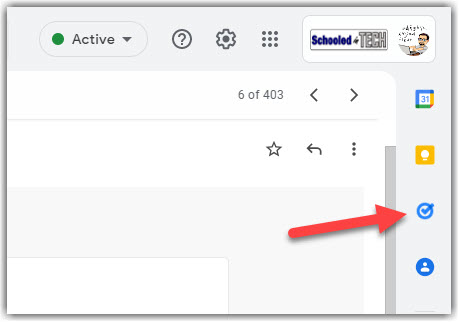
If you are a Gmail user you have likely seen icons on the right side of the screen like the ones in the image below. The one with a checkmark in a circle is for Google Tasks. That’s great for Gmail users and those that use Google Workspace for email, but what about the rest of us?
My school district uses Google Workspace for Drive, Docs, Slides, and other Google apps, but our email platform is Office 365. Therefore, the one Google app we do not use is Gmail. In this article, we’ll look at how you can access Google Tasks without Gmail and why you should be using it.
What is Google Tasks?
Google Tasks is a free Google app that will help you accomplish more at work and in your personal life. That may sound like a bold statement, but one of the biggest hurdles in accomplishing tasks is remembering what they are in the first place. Google Tasks allows you to create multiple task lists so you can see exactly what you need to do in every scenario. It will even remind you to do them.
I use a combination of Google Tasks and Google Keep to stay organized and on task throughout my day. Google Keep is my go-to for notes and I use Google Tasks for, well, tasks. In this post, we’ll focus on Google Tasks, but you should also check out my article on Google Keep.
How To Open Google Tasks Without Gmail
You may know that Google has a simple naming convention when it comes to accessing the Google apps from a website address.
| Google Sheets | sheets.google.com |
| Google Docs | docs.google.com |
| Google Drive | drive.google.com |
| Google Slides | slides.google.com |
| Google Forms | forms.google.com |
Simple, right? So you would think you access Google Task by going to task.google.com. Well….

That didn’t work. Tasks.google.com is part of the web address, it’s just not the whole address. The full address is tasks.google.com/embed/?origin=https://mail.google.com. Here’s what the task list looks like.
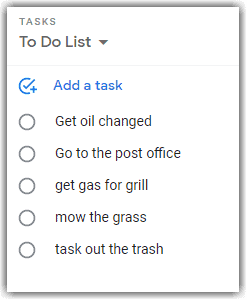
I agree. It looks horrible! I don’t use the URL above because the interface is designed for use on the side of Gmail. If this was all there was for Google Tasks, I would not have written this article. There is a better way to access Google Tasks.
Use TasksBoard for Google Tasks on Your Desktop
I use TasksBoard to access my Google Tasks. Its free version has several advantages over the basic Google option.
- View multiple Task Lists at the same time
- Drag tasks from one list to another
Tasksboard does have paid tiers, but I don’t use them. The free version has worked just fine for me. I’m not going to go into the differences in versions, instead, I’m going to show you how I use TasksBoard.
Get Started with Tasksboard
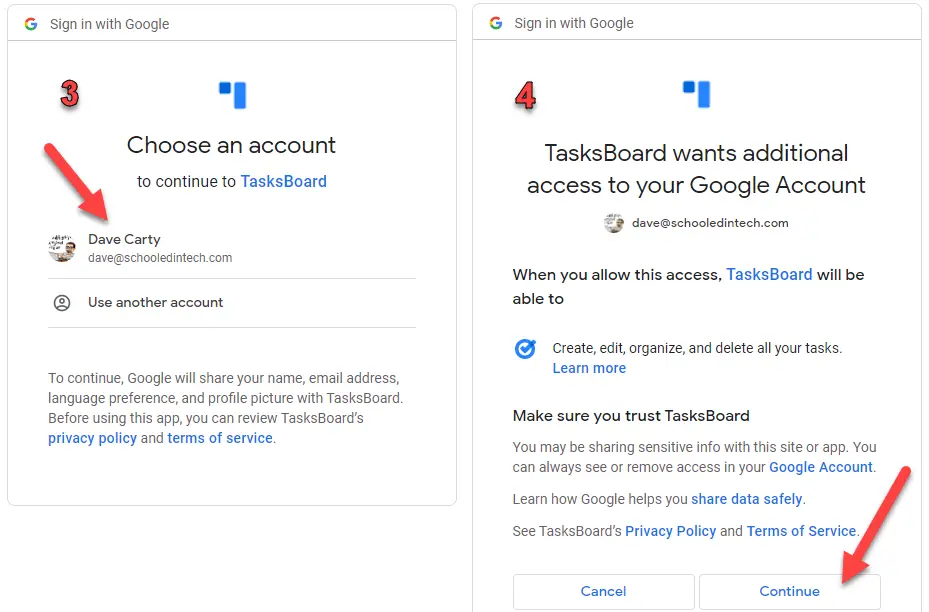
The first time you open TasksBoard you’ll need to sign in with your Google account and give TasksBoard permission to access your Google Tasks.
How to Setup TasksBoard
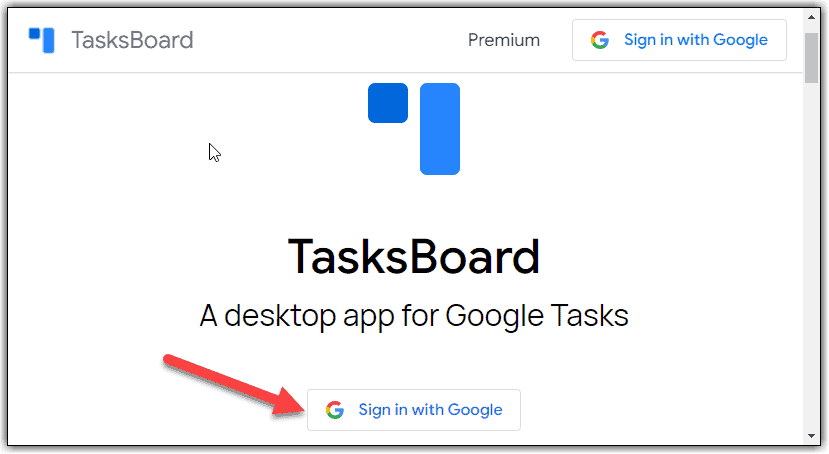
- Go to www.tasksboard.com
- Click Sign in with Google
- Sign in to your Google Account
- Give TasksBoards permission to edit, organize, and delete all your tasks by clicking continue
If you have previously created tasks and lists they will automatically show up in TasksBoard. Otherwise, your screen will look like the image below.

Google Tasks: Make Multiple Lists with TasksBoard
This is what your tasks could look like. The example below includes:
- Multiple Lists
- Sub Tasks
- Due Dates
- Attached Documents
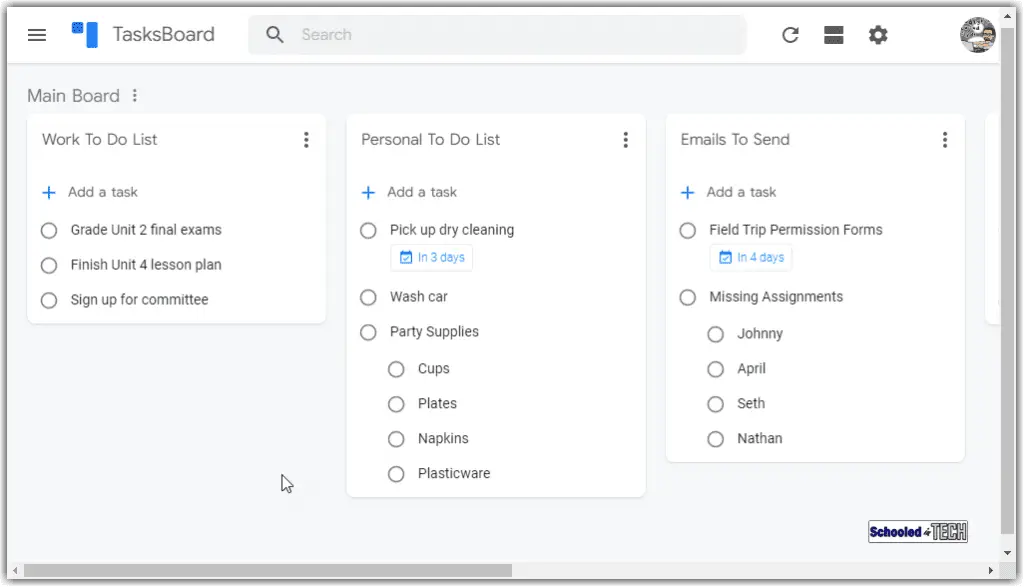
You can use all of these features or just the ones that benefit you. Your lists will line up side by side. You can use your mouse to scroll side to side to see all of your lists. You can scroll with your trackpad if you’re using a laptop or Chromebook. I show you how in my Tips For Chromebook Touchpads article. In the TasksBoard example above, there are 5 lists, though you are only seeing 3.
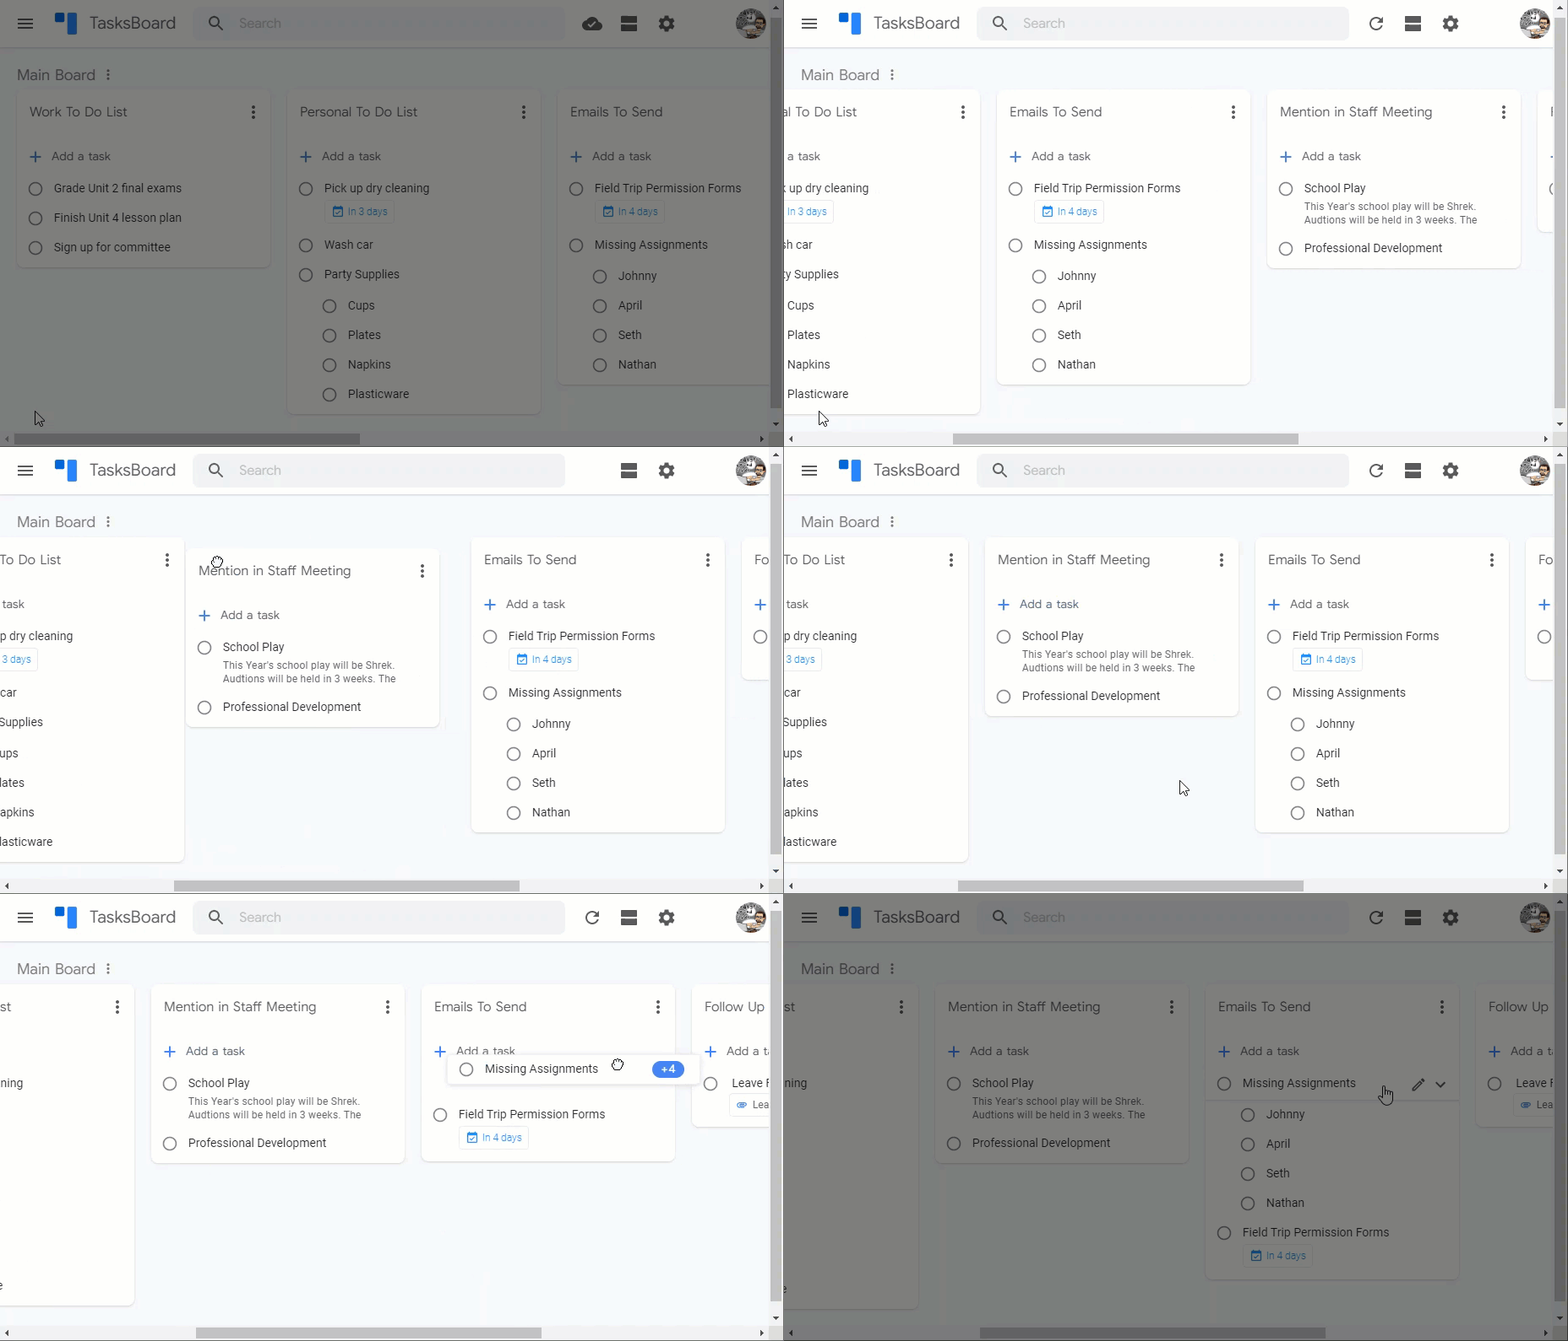
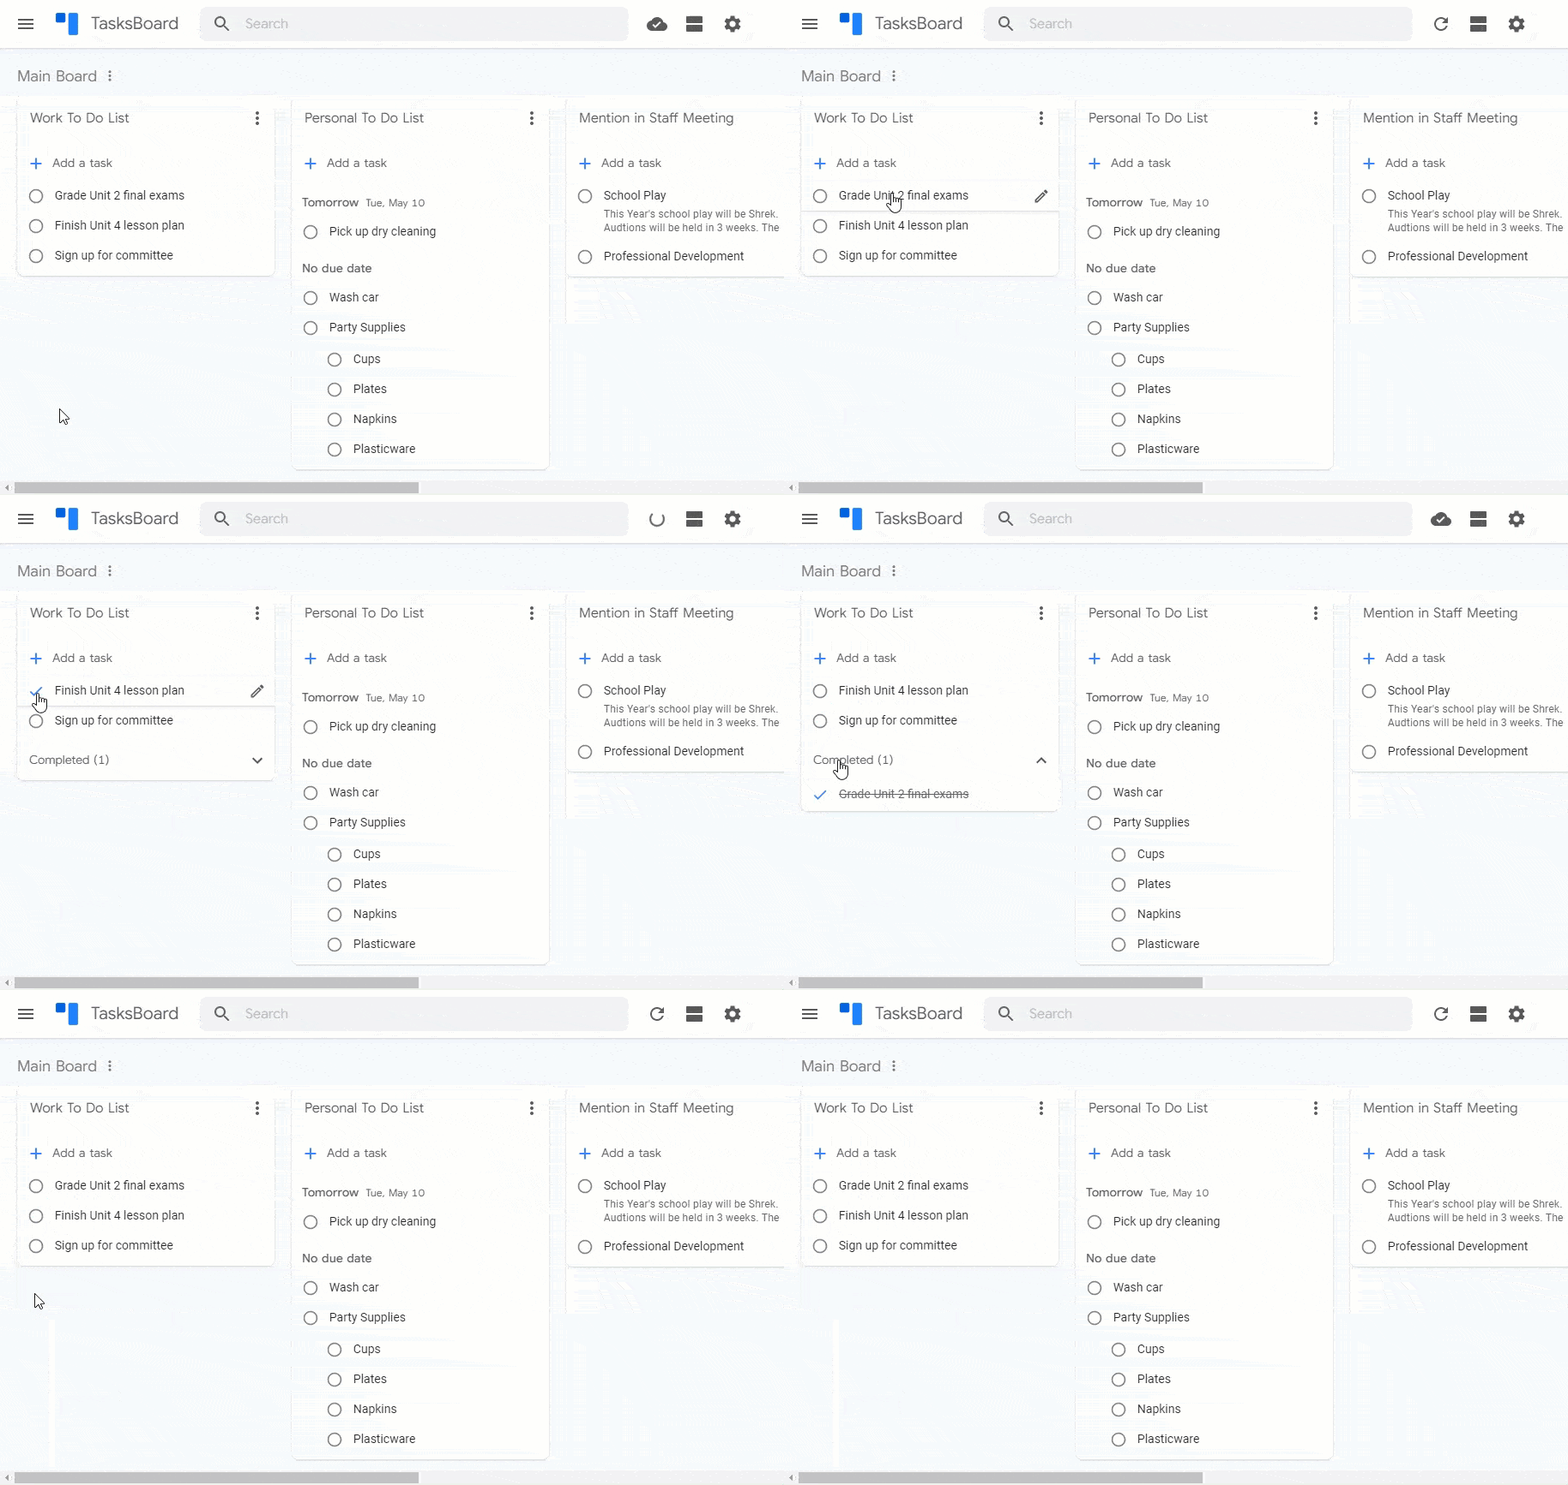
You can rearrange your lists at any time by clicking and holding on a list and dragging it left or right. The same is true for rearranging tasks within a list. In the clip below you can see me scrolling through my lists, rearranging lists, and rearranging tasks.
How to Create a Subtask
Subtasks are tasks you want to group under a parent task. For example, you could have a task that contains the name of a store and subtasks for the items you want to get at that store.
How To Create Subtasks
- Choose the list where you want to add your subtasks
- Click Add a task
- Create your parent/main task. In this example, we’ll create a task called Party Supplies.
- After you’ve typed the name, press the Enter key

- Click on the icon that looks like a pencil
- If you don’t see the pencil, hover your mouse pointer over the task name and the pencil will appear.
- Click on Subtask
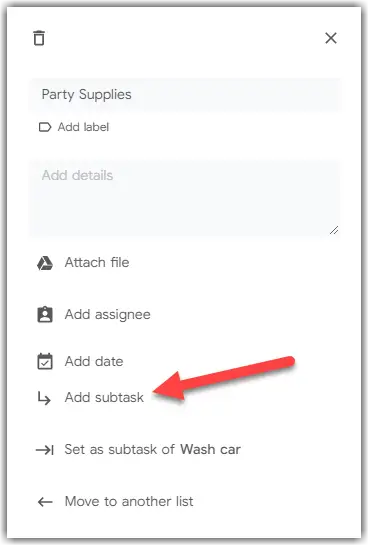
- Type the Subtask you want to create

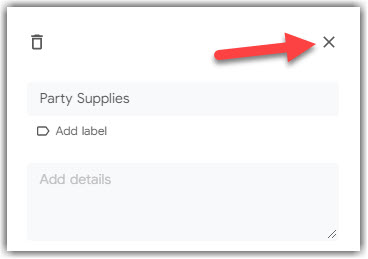
- If you want to enter another subtask press the Enter key. When you are finished adding subtasks, do one of the following:
- Click anywhere outside of the open task window.
- Click the “X” in the top right corner of the open task window.
Task List Menu
Each list you create has its own menu. You can access the menu by clicking the 3 vertical dots to the right of the menu name.
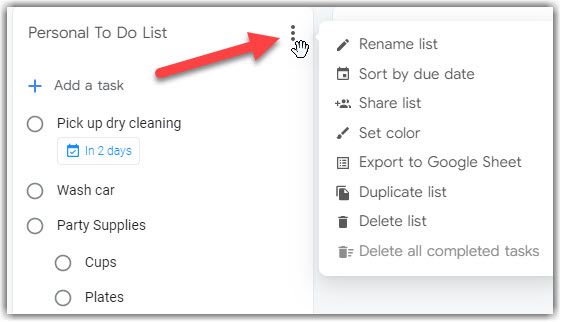
From the menu you can:
| Rename list | Change the name of your task list |
| Sort by | Toggle between due date and custom list |
| Share list | Share your list with others. They will be able to check off items too. |
| Set color* | This is one of the few features not available in the free version |
| Export | You can export your list to Google Sheets |
| Duplicate List | Make a copy of your list |
| Delete List | If you delete your list, it is gone for good. |
| Delete all completed tasks | Remove all of the tasks you have checked off |
Set a Due Date for a Task
You can set a due date for specifc tasks and subtasks within TasksBoard. The due date will show up under the task name. You can also sort your task lists by date due.
To set a task due date:
- Click on the icon to they right of your task name that looks like a pencil
- If you don’t see the pencil, hover your mouse pointer over the task name and the pencil will appear.
- Click Add Date
- Choose the date the task is do
- Exit the task editor by doing one of these steps:
- Click anywhere outside of the open task window.
- Click the “X” in the top right corner of the open task window.
Mark a Task Complete
There’s nothing quite like the satisfaction of marking a task complete. To do so, click the bubble next to your task or subtask. If you decide the task is not complete or click the wrong task, click the down arrow next to Completed. Then click the checkmark next to the task you want to mark as incomplete.
TasksBoard’s Desktop App
On Windows, Chromebooks, and Macbooks, you can install the TasksBoard Desktop app. This app does not require administrator rights to install. It is basically a framed Chrome browser window with its own icon. By using the app, you are less likely to accidentally close TasksBoard or go to another website in the TasksBoards tab.
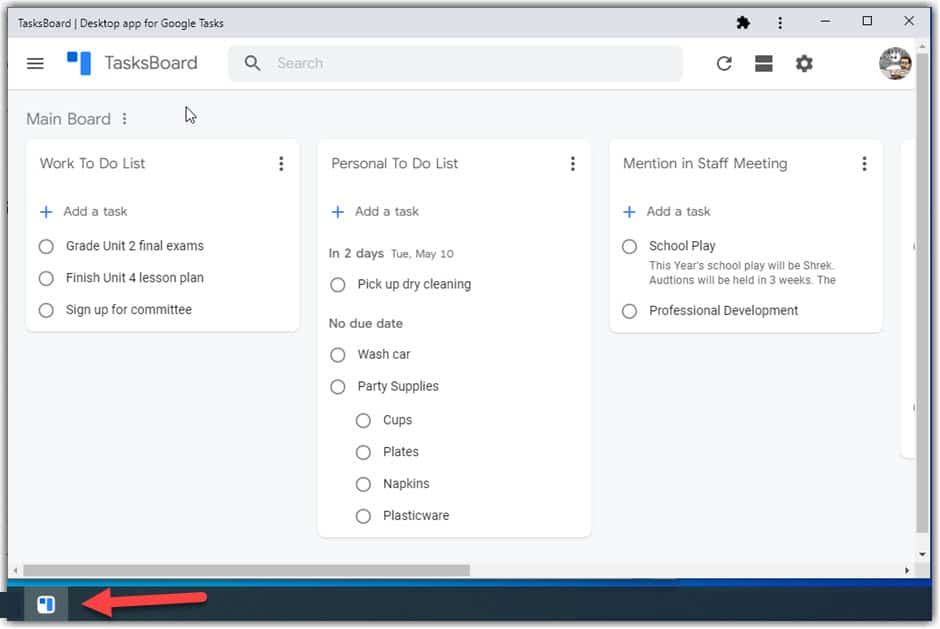
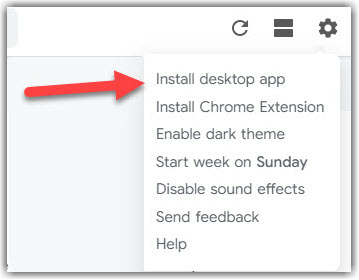
To install the Tasksboard’s Desktop app:
- Click the cogwheel to the right of the search bar

- In the menu that appears, click Install Desktop app
TasksBoard’s Chrome Extension
In the image above you see that there is an option to install the Chrome extension for TasksBoards I don’t recommend installing it. It shows your lists in a very basic format similar to the native Google Tasks views I shared earlier. If you want to access your lists outside of a Chrome tab, I would install the desktop app instead.
Dark Mode for TasksBoard
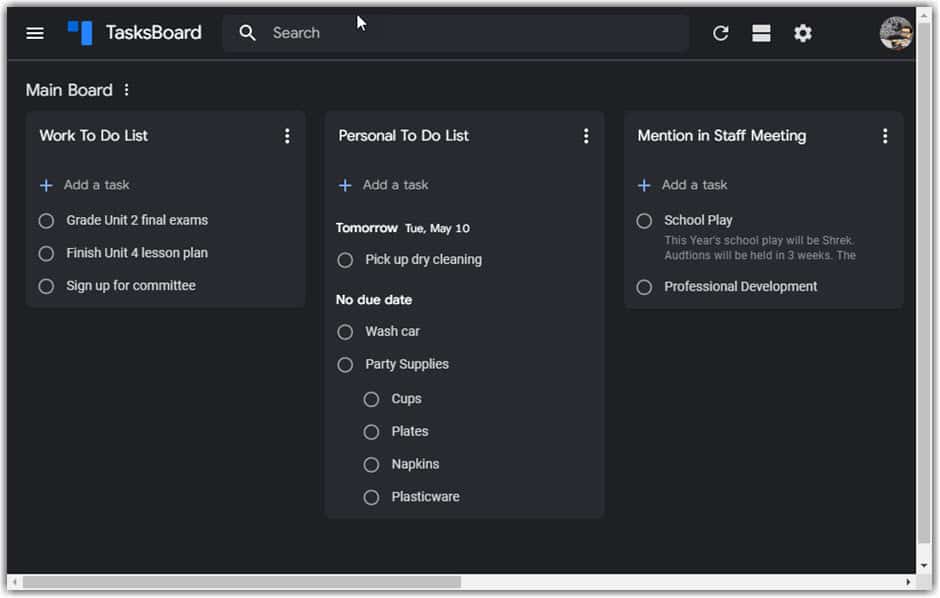
It seems everything has a dark mode nowadays and Tasksboards is no exception. It changes Tasksboard’s screen from white to black.
To enable Tasksboard’s Dark Theme:
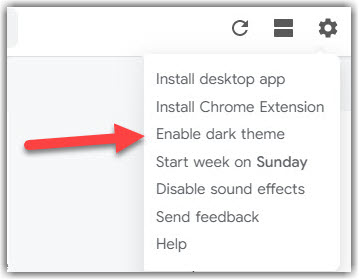
- Click the cogwheel to the right of the search bar

- In the menu that appears, click enable dark theme.
Here’s what the dark theme looks like.
Change The First Day of the Week in TasksBoard
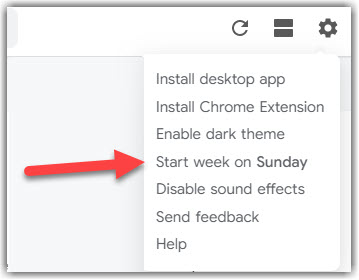
By default, Sunday is considered the first day of the week in TasksBoard. However, you can change the first day to Saturday or Monday if you prefer.
To enable Tasksboard’s Dark Theme:
- Click the cogwheel to the right of the search bar

- In the menu that appears, click “Start week on” to cycle through the options until your preference is shown.
How to Use Google Tasks on Your Phone
Google has a Tasks app for both iPhone and Android and they work well.
From the mobile app you can:
- Create a new task list
- Swap between task lists
- Create tasks
- Create subtasks of an existing task
- Create a task reminder
- Reorder tasks
- Add notes to a task
- Complete tasks
- Delete tasks
- Access Tasks using multiple Google accounts
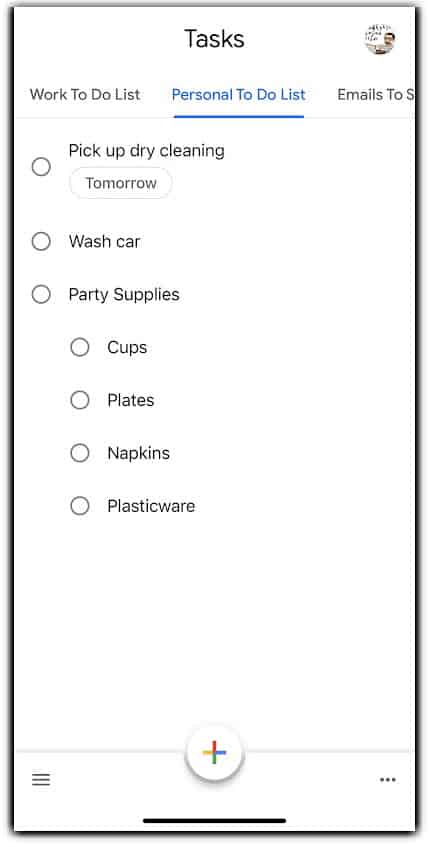
I use a combination of the TasksBoard desktop app on my computer and the Google Task app on my phone to keep up with the tasks I need to both at work and at home. As I mentioned earlier, I use Google Keep for notes and other documentation that aren’t tasks. Now that you understand Google Tasks, check out my article on how to use Google Keep.
