Google has a feature within Google Takeout to move your Google Drive to another Google account. This transfer feature is only available for Google Education domains.
Who can use this feature?
- High school seniors who want to transfer their Google Drive to a personal Google account
- Teachers who are moving to a new school district
- College students who are about to graduate.
- Students who are moving out of the district
Even if you think you’ll never need your files again, it’s worth moving them just in case. Once you lose access to them, it’s difficult, if not impossible, to gain access to the files in your old account again.
Google Takeout’s Education Domain Transfer tool
You may have heard or even used Google Takeout before, but what we are about to cover is not the same Takeout the rest of the world uses. You can download your data using Google Takeout, but only education customers can directly transfer their data to another account. Thanks Google!
The transfer tool has a specific URL. takeout.google.com/transfer
This tool will transfer data from two Google Apps:
- Google Drive
- Gmail
My school district doesn’t use Gmail, so we only need to export files from Google Drive. Google Drive contains files you have saved from Google Docs, Slides, Sheets, and other Google apps.
If you see the message below after clicking the link above, your Google Account cannot use the transfer tool.
Transfer Files From Your School Account to Another Account
To transfer your files, you’ll need another Google account. This account can be a personal account ending in @gmail.com or another Education account (if moving to another school district.)
- Go to takeout.google.com/transfer
- Sign in with your school account. (You may already be signed in.)
- Enter the email address you want to transfer your files to.
- If you don’t have another Google account, click Create an account.
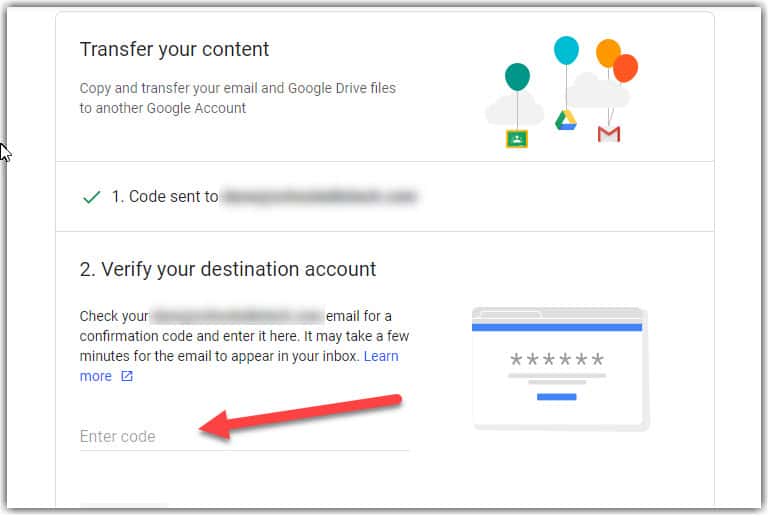
- Click Send Code
- The screen should now look like the image below.
- Open your personal Google account’s email either in another tab or on your phone.
- Find the recent email from Google.

- Open the email and click on the Click on Get confirmation code button.
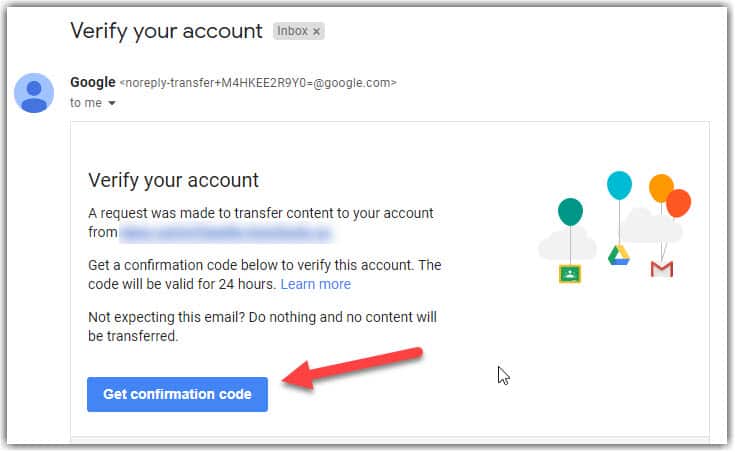
- A webpage will open, displaying a code like the open below. The code is only good for 24 hours.
- Highlight the code and copy it (Ctrl + C) or write it down.
- Go back to the tab where we clicked “Send Code” and enter the code.
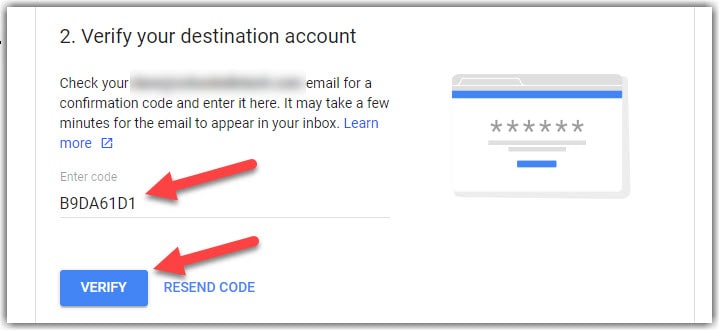
- Click Verify
- Choose which apps from which you want to transfer data.
- The transfer tool can move data from Gmail and Google Drive
- Since my school district doesn’t use Gmail, I only have the Google Drive option available.
- Notice that your school Google account is listed with an arrow pointing to your personal Google account.
- Notice the screen says Copy and transfer to… We’ll cover that more later.
- Click Start Transfer
- You may then be prompted to enter your school account password
- You should now see the screen below.
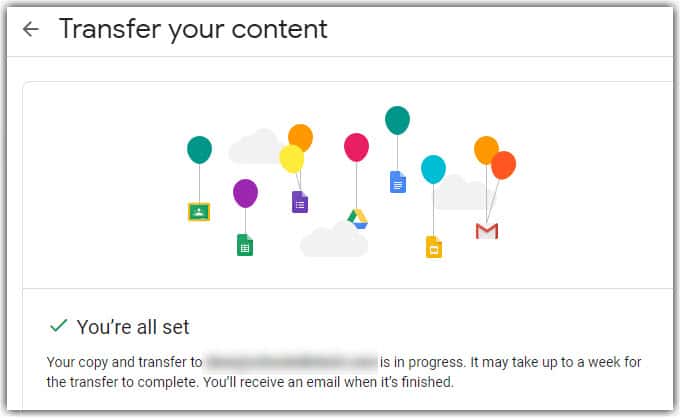
In the previous image, Google says, “it may take up to a week for the transfer to complete.” If you’ve waited until the last few days of school to do this, don’t worry. It’s very unlikely that your school district will delete your account on the last day, though you may lose access to it.
Since you’ve done these steps, you’ll get an email at your personal address once the files have been transferred. You should have an email in your personal inbox right now saying the transfer has begun.
Transfer Really Means Copy
The term transfer is misleading. Typically when you transfer something, you move it from Point A to Point B. In the case of Google Takeout Transfer, what’s really happening is a copy is being made in the new location.
You’ll have files in both locations with the same name. These are two separate files. If you update the file in one location, it will not update the files in the other location. Keep this in mind if you will be using both Google accounts for a while longer.
I do not recommend running the transfer more than once. If you do all of your files will be transferred again. This will result in two folders being created in your personal Google Drive essentially doubling the amount of space being used.
If you do run the transfer again, delete the older folder copy.
Where are My Files Saved?
It would be a real mess if Google dropped your files in your main Google Drive folder with all the rest of your personal files. Instead, Google creates a folder called “your school email address” + “date transferred” + “time transferred”. Inside that folder, your will find all of your files and folders.
Problem With Your Google Content Transfer
You may get an email from Google that looks like this when your transfer is complete.
An email like this means:
- The content transfer has finished
- Some files were copied.
- Some files could not be copied
Unfortunately, there was a glitch in the email I received and the list of files not copied shows null (null) for each file. Looks like a mail merge gone wrong. You may have the same experience, or your file names may show up.
Either way, it’s ok. We can view the list of files not transferred/copied.
View Your Transfer History
Once your files have been transferred, you can view the transfer history by once again going to takeout.google.com/transfer from your school account again. This time you should see a View History link like the one in the image below.
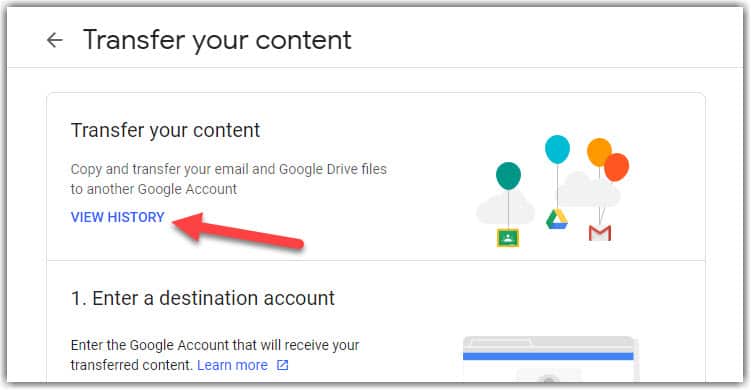
Click the link to view your Transfer history. You’ll see a list of files that did not transfer. It’ll be similar to the image below.
Each file name above is a direct link to the file that could not be copied. There are a few reasons why some files may have failed to transfer.
Why Did Some of My Files Fail To Transfer?
If you received an email like the one above, there are a few reasons why this may have happened.
1. Shared file is blocked from sharing outside the domain
When users share files with you, they have the option to block the file from being shared outside of the school domain. It depends on whether or not the boxes below are checked.
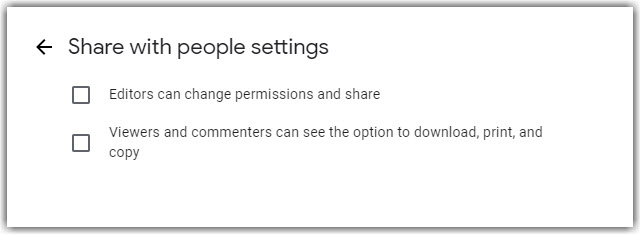
Since it’s not your file, you may not care if it is transferred. If you do want the file, you’ll need to copy and paste the information within the document (not the file itself) into a document you own.
2. Out of Google Drive space on your personal account
Every public Google account gets 15GB of storage data for free. 15GB is a lot, but considering your education account is virtually unlimited, you may have exceeded the 15GB. You can see how much of your personal storage space you are using by going to this link. https://drive.google.com/settings/storage
We all love free, but online storage through Google isn’t expensive. As of this writing, you can purchase 200GB of Google Drive Storage for $2.99 a month or $29.99 a year. Check the latest prices at this link. https://one.google.com/storage.
If you purchase a Chromebook, you can get 100GB of Google Drive storage free for a year. Here’s a link to Google’s Chromebook Perks.
3. Gremlins
There is no good explanation for gremlins. Something just didn’t work. In my tests, the same files that failed the first time, failed when I tried the transfer again. I recommend clicking on each file link and trying to download the file manually. Then move it to your personal Google Drive.
If downloading isn’t an option, try copying and pasting the content of the file to a different file as I suggested in #1.