Whether you have a managed school or personal Chromebook, there are times when it is necessary or convenient to reset it back to factory settings. This process removes all of the account profiles and allows you to set a new owner for personal Chromebooks.
Some reasons for factory resetting a Google domain managed Chromebook include:
- You have programmed settings for your devices and users in the Google Admin Console, but a particular Chromebook is not receiving the same settings as other Chromebooks within an OU.
- You may find the last sync date to be a while back even though the Chromebook is constantly used.
- It’s acting “weird.”
If this is a school-owned Chromebook managed using the Google Admin Console, Powerwashing will not remove it from your domain. The Chromebook will rejoin your domain when it boots back up and connects to Wi-Fi before anyone can log in.
In this article, I’m showing you how to Powerwash a Chromebook at the Chromebook, but you can also Powerwash it using the Google Admin Console. I show you how in my Powerwash Chromebooks Using the Google Admin Console article.
Powerwash Chromebook running newer Chrome OS
Powerwashing has become simple on Chromebooks running a newer version of Chrome OS. Just follow these simple steps.
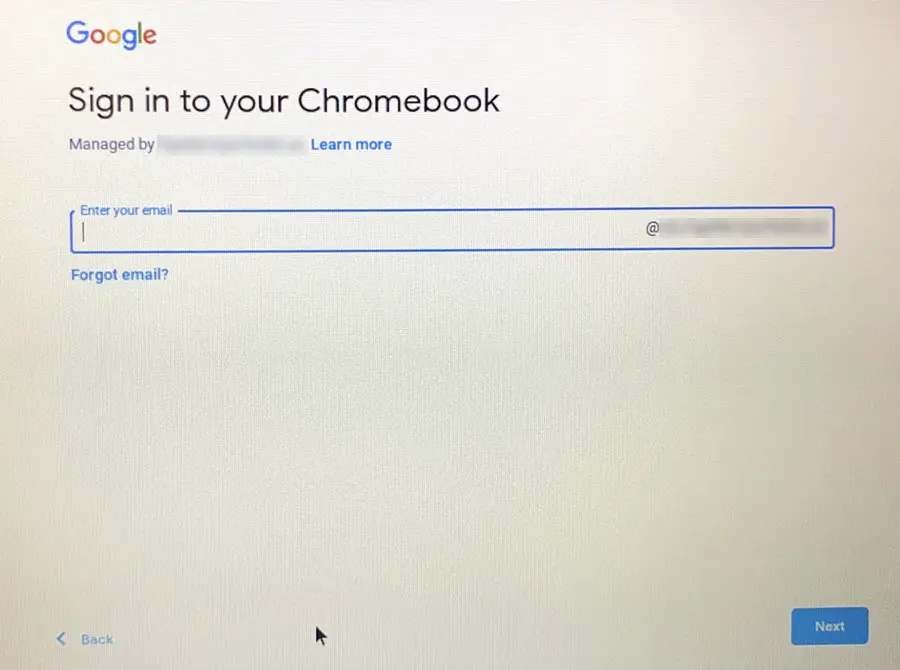
- Turn on your Chromebook or Sign Out so you are viewing the logon screen
- Press Ctrl + Alt + Shift + R
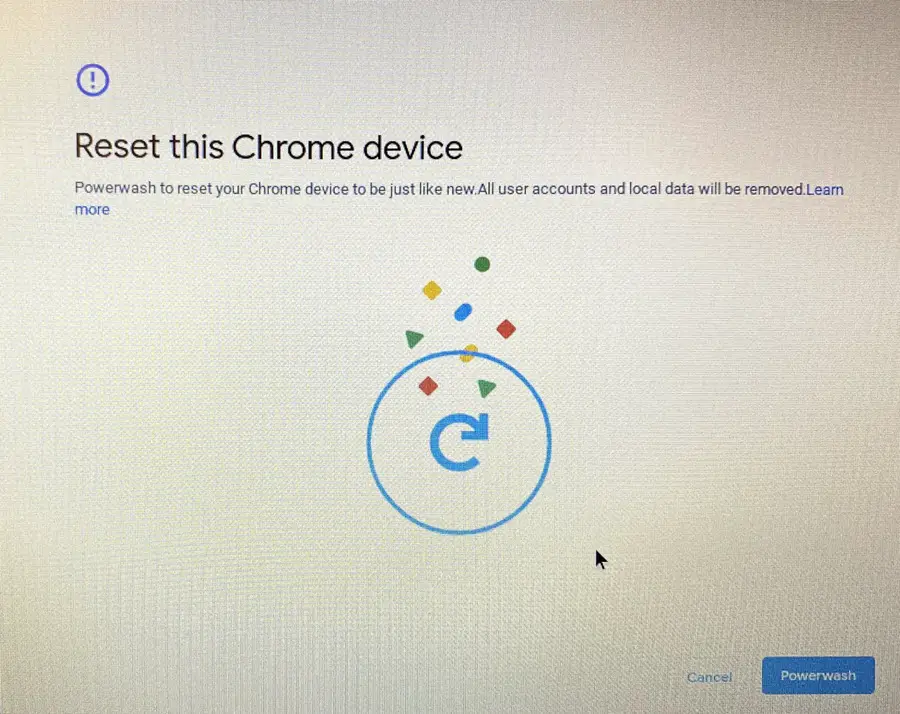
- Select Powerwash
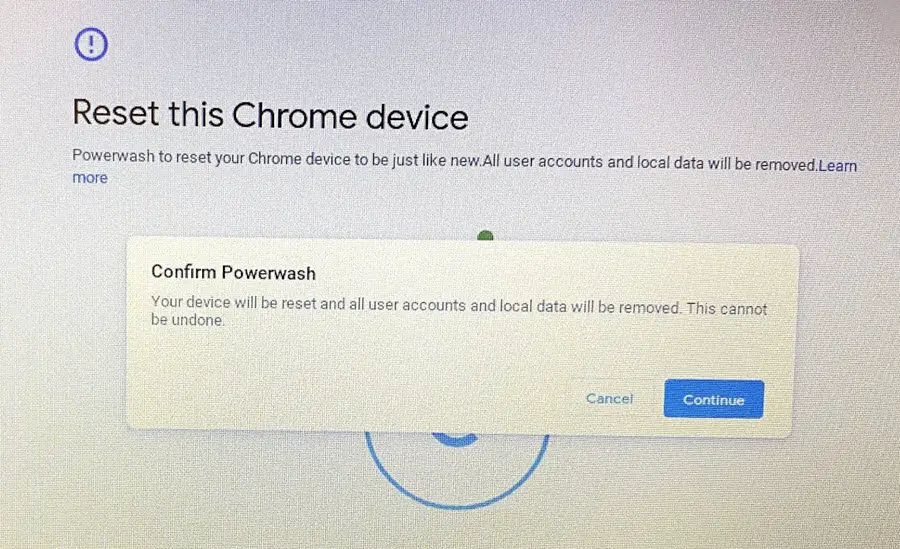
- Click Continue
All settings and accounts will be removed from your Chromebook and it will boot up just like it did when you took it out of the box. The exception is, that it will still be running the current Chrome OS version.
If this is a school Chrome book that is managed by the Google Admin Console, the Chromebook will automatically rejoin your school’s domain when it boots up and is connected to Wi-Fi.
Powerwash Older Chromebooks
If the steps above did not work for you, you may be running an older version of Chrome OS. No big deal, you can still Powerwash your Chromebook by following the steps below.
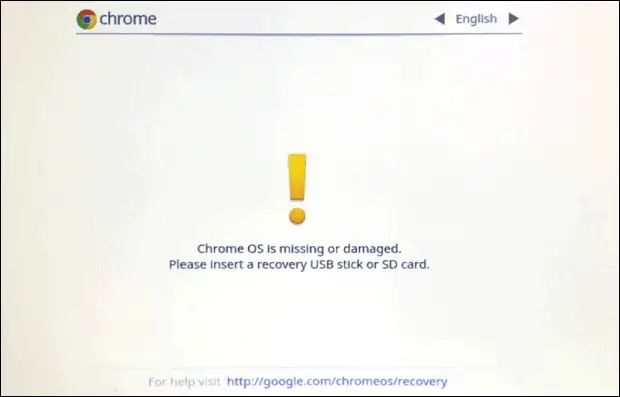
- Boot up the Chromebook
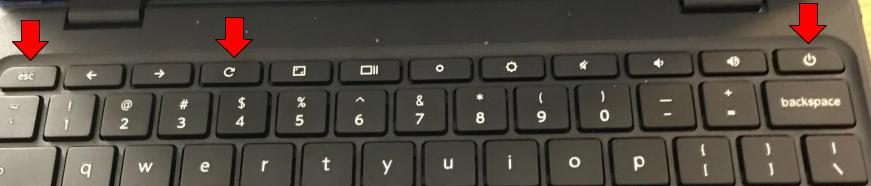
- Press Esc + Reload + Power
- The Chromebook will reboot and show the following screen. If not try the keystrokes again.
- Press Ctrl + D
- The Chromebook will then show the following message: “To turn OS verification off, press Enter…”
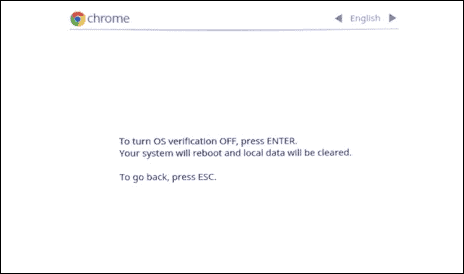
- Press Enter
- The Chromebook will reboot to a screen saying OS Verification is turned off.
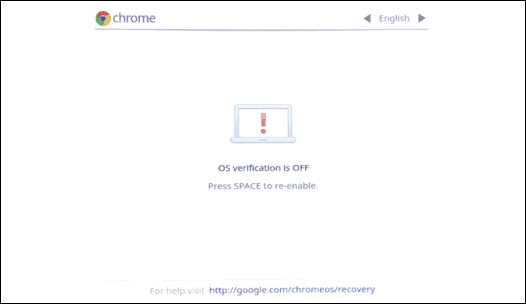
- Press the Space Bar
- Press Enter
- The Chromebook will show the following screen and reboot.
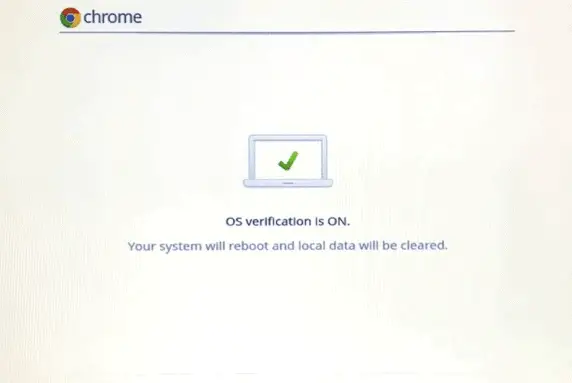
- At this point, the Chromebook will factory reset and boot back up in Verified (Normal) mode.
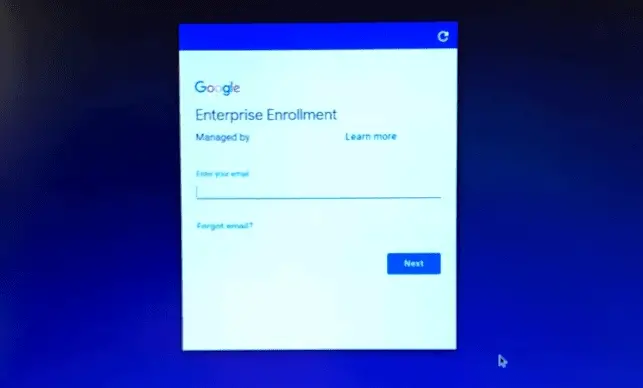
- When the Chromebook boots back up, choose the proper wireless network to connect to. In our domain, we force re-enrollment after a reset.
- Click Continue
- Click Accept and continue
Beginning around Chrome OS version 67, Chromebooks will automatically re-enroll after being Powerwashed if you have force re-enrollment set in the Google Admin Console. So you will only need to perform the next steps if your Chromebook is using an older Chrome OS version or for some reason, it does not auto re-enroll.
Any staff or student account in our domain can enroll the Chromebook. The Chromebook should join back to the same OU in the management console.
After the device has been enrolled it is ready for use.
You can disable the ability for users to Powerwash managed Chromebook in the Google Admin Console. I show you how in my Stop Students From Powerwashing Chromebooks article.