There are multiple ways to get information about your Chromebook. A lot can be found by scrolling through Settings. However, sometimes it’s nice to see all the information in one place, especially when you are troubleshooting.
Chromebooks record information in multiple log files which can be opened individually if you know the file paths. You can view the data in most of these logs by looking at the About System page in Chrome. It shows the Chromebook’s Systems Diagnostic Data all in one place.
You can access this page on your Chromebook by typing chrome://system in your Chrome Address Bar. The About System page shows static information. This means the current data is pulled when you load the page, and it does not change until you refresh the page or close and open the page again.
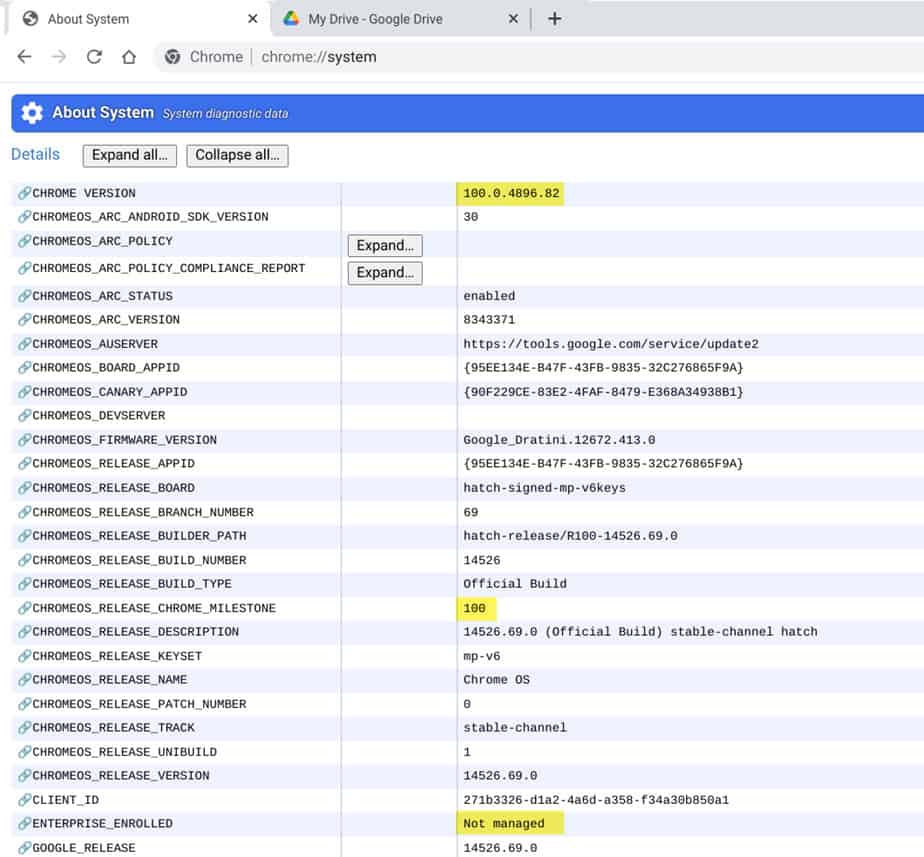
The first piece of information on this page is the Chrome Version. As you can see, my Chromebook is currently running version 100.0.4896.82. Most people would focus on the major release number, 100. The major release is referred to as the ChromeOS_Release_Chrome_Milestone on the page.
Another helpful thing a can quickly learn is that Enterprise_Enrolled is listed as Not managed. This makes sense since I’m looking at my personal Chromebook. If I were using a school Chromebook or a Business owner Chromebook, I would expect to see Managed listed.
If you have a school Chromebook not receiving the correct Device Settings and it shows “Not Managed, ” you have found your issue. It either was not Enterprise Enrolled correctly, or it has been Powerwashed/Reset, and for some reason (could be a Google Admin Console setting), it did not automatically re-enroll itself.
There is a ton of other information on this page. Some of it is more beneficial/interesting than others. Here are the sections I find helpful. We’ll start at the top of the About System page and work our way down.
Which Android Apps Am I Allowed To Install On My Chromebook
If your school or organization uses Android apps on Chromebooks, they are likely to manage which apps can be installed. The Chromebook has limited space, so you don’t want to go install crazy with Android apps. As a rule of thumb when managing our domain, I ask myself if the Android app adds functionally to the Chromebook that the app’s web version doesn’t.
For example, the Office 365 web app for Outlook has more functionality than the Android app, so adding this app doesn’t make sense. It’s also worth mentioning that not all Android apps can be installed on a Chromebook. Some app developers block that capability either intentionally or inadvertently.
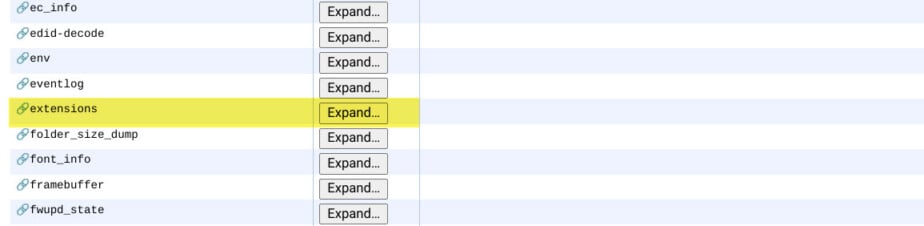
To see the list of Android apps you are allowed to install, click Expand next to ChromeOS_ARC_Policy.

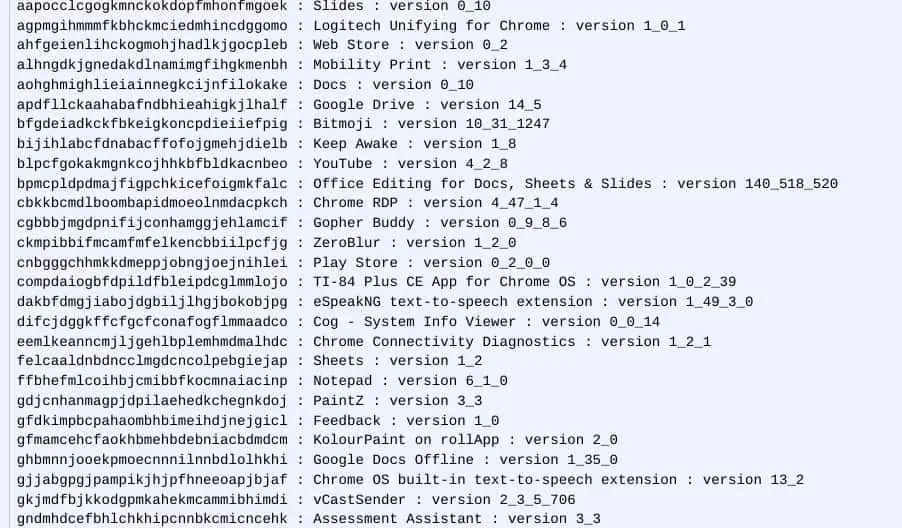
Above, you can see the list of Android apps I’m allowed to install using my school Google domain account. Since I’m constantly testing apps, my list is much more extensive than a typical student or teacher in our domain. Looking through the list, you can see familiar names such as:
- Scratch
- Lego Spike
- Minecraft EDU
- Stop Motion Studio
The list in the ChromeOS_ARC_Policy is not formatted in a way that is easy to read. I wouldn’t tell a student or teacher to look at this view to see what they can install. Instead, they should click on the Google Play icon and see what is listed. There they will find a formatted screen with icons like the one below.

Using the ChromeOS_ARC_Policy for Troubleshooting
If you are trying to troubleshoot why an app is not listed in the GUI or why the app may not be installed, the ChromeOS_ARC_Policy log can be helpful. For one, it shows the install options for each app.
- Available means the user has the option to install the Android app, but it won’t install automatically.
- Force_Installed means the app will automatically install on the Chromebook when the user logs on.
I do not recommend using Force_Installed for Android apps. Truthfully, I only did it this time to show you an example.

Reasons for not force installing apps include:
- Android apps can be large files.
- They can quickly fill up your Chromebook storage.
- Downloading the app could impact your wireless bandwidth.
- The app will automatically install on every Chromebook the user logs into whether they plan to use it or not.
- Forcing app installs can exasperate Chromebook storage and WiFi bandwidth issues if students share Chromebooks or use different Chromebooks.
Instead, allow your users to install the app if and when they need it. If it is listed for them in Google Play, they can install it without special permissions.
View Installed Extensions and Version Information
Chrome://extensions shows the Extensions and Chrome Apps you have installed. If you’d like a simple list, you can view it on the About System page.
- Scroll down until you find Extensions
- Click Expand
Now you will see a list of Extensions and Chrome Apps installed on your Chromebook which includes the app:
- Extension ID
- Name
- Version
Some of the Chrome Apps are installed by default.
Show Which Apps and Extensions are Currently Using the Most Memory (RAM)
Each extension you run impacts the speed of your Chromebook by using some of your available memory, called RAM.
The mem_usage_with_title section of the About System page will show you how much memory each extension is using.
- Scroll down until you find Extensions
- Click Expand

The image above shows the amount of memory used in megabytes (MB) by apps such as:
- Browser (Chrome Browser)
- Tabs – Sites/pages you have opened
- Extensions
- GPU (Graphics Processing Unit) – used for graphics and video rendering
- Utilities
You can see I have the extensions Lastpass (75MB), Bitmoji (47MB), and Notepad (45MB) running using a total of 167 MB of RAM. I have several other extensions installed but do not currently have them enabled.
In my Slow Chromebook? Let’s Fix It Fast! article, I discuss ways to quickly toggle extensions on when you need them and off when you don’t.
How Much Memory (RAM) Is My Chromebook Using?
The meminfo section of About System can help answer the following questions about your Chromebook’s memory.
- How much memory does my Chromebook have?
- How much memory is my Chromebook using?
- How much memory does my Chromebook have available?
- Scroll down until you find meminfo
- Click Expand
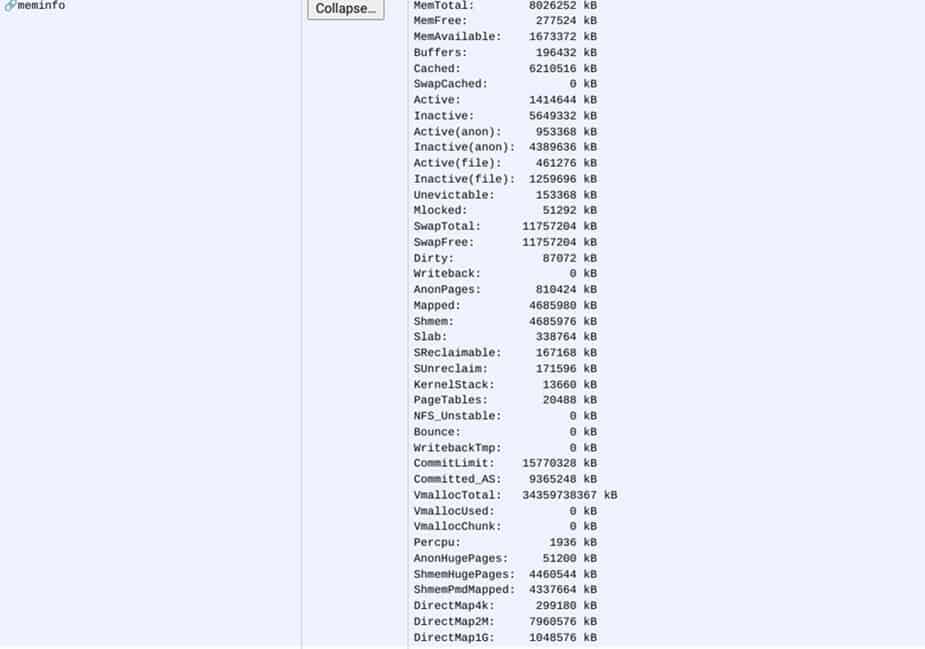
All of the numbers above are listed in kilobytes (KB). No one talks about RAM in KB numbers. You would use megabytes (MB) or Gigabytes (GB).
1,000 kilobytes (KB) = 1 MB
1,000 megabytes (MB) = 1 GB
Also, we round off those numbers.
There is more information about your Chromebook’s memory than you’d ever want to know. Let’s look at the most helpful information.
MemTotal: 8026262 KB
- The total about of RAM in the Chromebook example above.
- This number is typically referred to in Gigabytes (GB).
- This Chromebook has 8 GB of RAM in total.
- The first Chromebooks had 2 GB of RAM.
- Most school Chromebooks today have 4 GB of RAM, but I expect that to change to 8 GB soon.
MemAvailable: 1673372 KB
- Amount of RAM the Chromebook has available to use. 1.7 GB in our example.
- Determined by calculating the amount of MemFree plus the amount of RAM that the system could be reclaimed and reused.
- Use this number when determining if you are maxing out your Chromebook’s memory.
MemFree: 277524 KB (less critical)
- Amount of RAM not being unused by the system.
- Currently, this Chromebook has 278 MB of RAM not being used at all.
- If this number is low, don’t worry too much about it.
View Chromebook WiFi Strength
In the bottom right corner of a Chromebook screen, a WiFi icon shows if the Chromebook is connected to WiFi. It also offers three curved bars that represent WiFi strength.
Using the network-health-snapshot section of the About System page, you see the WiFi strength represented by a number between 1 and 100. You can also see periodic samples of your WiFi strength since you turned on your Chromebook.
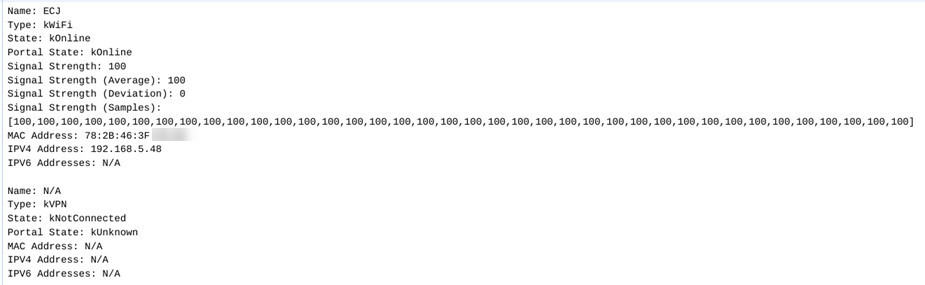
Besides signal strength, the network-health-snapshot also shows:
- Name of the connected wireless network.
- Your Chromebook network card’s MAC address.
- The Chromebook’s internal IP address assigned by the wireless network.
Find Chromebook Serial Number in System Log
Viewing the VPD_2.0 log would be the only way to view the serial number if you were assisting someone remotely using Google Report Desktop.
You can also see the Chromebook model name and SKU number on the About System page. There are four other less obviously worded variables in the vpd_2.0 log.
Should_send_rlz_ping
- 1 = send the ping
- 0 = don’t send the ping
- Other than that, I have no idea
Block_devmode
- 1 = Developer mode is not blocked (not the same thing as enabled)
- 0 = Developer mode is disabled
- School Chromebooks should be set to 0.
Check_enrollment
- 1 = Chromebook should check to see if it has been previously Enterprise Enrolled when it boots up after a Powerwash / Factory Reset. If so, the Chromebook should automatically re-enroll.
- 0 = Don’t check
- A 0 means one of two things.
- A domain does not manage Chromebook. Likely a personal Chromebook
- The Google Admin Console is not configured correctly to force Chromebook to re-enroll
- This will result in a lot of stolen Chromebooks turning into personal Chromebooks. Think early iPhone/iPad days.
ActivateDate
- Year and day of the month the Chromebook was last Enterprise Enrolled.
There is a lot of other information on the About System page. Depending on the information you are looking for or the issue you are troubleshooting, you may want to take a look at the other sections.